SSV Setup
SSV Network ↗ is a permissionless DVT network that provides a simple infrastructure for splitting and distributing a validator key into multiple key shares to run a validator across multiple non-trusting nodes.
In this guide, you will:
- Generate encrypted operator keys
- Run your own SSV node
- Register as an SSV operator
- Distribute your validator keys to cluster operators
Prerequisites
Before proceeding, ensure you have the following:
- Install Docker Engine ↗
- Ensure Docker is running:
docker ps
CONTAINER ID   IMAGE     COMMAND   CREATED   STATUS    PORTS     NAMES
- Create Vault →
- Operator Service installed →
 Hardware Requirements
SSV node requires (in addition to your beacon/execution nodes): 2 cores, 2GB RAM, 20GB storage, >8K IOPS. See full requirements ↗.
Become SSV Operator
To join the SSV network as an operator, you must run an SSV node—the software that implements the SSV protocol and communicates with the network's smart contracts. It connects to your beacon and execution clients, receives encrypted KeyShares, and collaborates with other operators in a DVT cluster to perform validator duties—without ever holding the full private key.
Becoming an SSV Operator involves generating keys, running the node software, and then registering as an operator through the SSV webapp ↗ to start earning rewards.
While there are different setup options ↗ with the SSV Stack ↗ being the most straightforward option, this guide covers Manual Setup offering full customization and control. Let's get started ![]() .
.
Step 1: Generate Operator Keys (Encrypted)
The most secure way to run your Operator node is to generate an encrypted key pair. This way, your Public Key and Secret Key will be encrypted with a password of your choosing.
Password File
You will need to create a file (named password in this example) containing the password you choose for your Secret Key:
echo "<MY_OPERATOR_PASSWORD>" >> password
Key Pair Generation and Encryption
The node Docker image will generate keys for you, then encrypt them with a password you provide, using the following command:
docker run --name ssv-node-key-generation \
  -v "$(pwd)/password":/password \
  -v "$(pwd)":/data \
  -it "ssvlabs/ssv-node:latest" \
  sh -c "/go/bin/ssvnode generate-operator-keys --password-file=/password && cp /encrypted_private_key.json /data/" \
  && docker rm ssv-node-key-generation
This command will generate encrypted_private_key.json containing your encrypted Operator Key and the Public Key needed for registration.
encrypted_private_key.json
{
  "checksum": { ... },
  "cipher": { ... },
  "kdf": { ... },
  "pubkey": "LS0tLS1CRUdJTiBSU0EgUFVCTElDIEtFWS0tLS0tCk1JSUJJakFOQmdrcWhraUc5dzBCQVFFRkFBT0NBUThBTUlJQkNnS0NBUUVBNDF5..."
}
Public Key
Pay close attention to the pubkey field in the output, as it contains the public key needed to register the Operator later on the SSV network. To extract just the public key value, run:
grep -o '"pubkey":"[^"]*"' encrypted_private_key.json
Step 2: Run SSV Node
Create Configuration File
Create a config.yaml file and replace the placeholders (ETH2_NODE, ETH1_WEBSOCKET_ADDRESS, ENCRYPTED_PRIVATE_KEY_JSON, PASSWORD_FILE) with your actual values.
config.yaml
global:
  # Console output log level
  LogLevel: info

  # Debug logs file path
  LogFilePath: ./data/debug.log

  # Number of log files preserved, 500MB each (time duration depends on number of validators and other factors).
  # Roughly equates to half a day.
  # Increase if you want to preserve log files for longer. This would require more disk space
  LogFileBackups: 10

db:
  # Path to a persistent directory to store the node's database.
  Path: ./data/db

ssv:
  # The SSV network to join to
  # Mainnet = Network: mainnet (default)
  # Hoodi = Network: hoodi
  # Sepolia = Network: sepolia
  Network: mainnet

  ValidatorOptions:
    # Block proposals are by default controlled by Beacon Node.
    # Requires the connected Beacon node to be MEV-enabled.
    # Please see https://docs.ssv.network/operators/operator-node/setup-sidecars/configuring-mev

eth2:
  # HTTP URL of the Beacon node to connect to.
  BeaconNodeAddr: <ETH2_NODE> # e.g. http://example.url:5052

  # Enables improved attestation accuracy by scoring responses from multiple Beacon nodes.
  # Will have no effect with only 1 endpoint.
  WithWeightedAttestationData: false

  # Enables parallel Attestation and Sync Committee submissions to multiple Beacon nodes.
  WithParallelSubmissions: false

eth1:
  # WebSocket URL of the Eth1 node to connect to.
  ETH1Addr: <ETH1_WEBSOCKET_ADDRESS> # e.g. ws://example.url:8546/ws

p2p:
  # Optionally provide the external IP address of the node, if it cannot be automatically determined.
  # HostAddress: 192.168.1.1

  # Optionally override the default TCP & UDP ports of the node.
  # TcpPort: 13001
  # UdpPort: 12001

KeyStore:
  PrivateKeyFile: <ENCRYPTED_PRIVATE_KEY_JSON> # e.g. ./encrypted_private_key.json
  PasswordFile: <PASSWORD_FILE> # e.g. ./password

# Enables Doppelganger Protection for validators, see https://github.com/ssvlabs/ssv/blob/v2.3.0/doppelganger/README.md
EnableDoppelgangerProtection: false

# This enables monitoring at the specified port, see https://docs.ssv.network/operators/operator-node/monitoring/
MetricsAPIPort: 15000
# This enables node health endpoint for troubleshooting, see https://docs.ssv.network/operators/operator-node/maintenance/troubleshooting
SSVAPIPort: 16000
 WebSocket Required
Make sure your ETH1Addr endpoint is communicating over WebSocket and not over HTTP in order to support subscriptions and notifications.
Start the Node
Potential Slashing
Do not run multiple instances of SSV Node with the same set operator keys.
This does not increase validator resiliency and could lead to validator slashing 🔥.
To start your node, run the following Docker command in the same folder you created the config.yaml file in the previous step:
docker run --restart unless-stopped --name ssv_node -e \
CONFIG_PATH=/config.yaml -p 13001:13001 -p 12001:12001/udp -p 15000:15000 -p 16000:16000 \
-v "$(pwd)/config.yaml":/config.yaml \
-v "$(pwd)":/data \
-v "$(pwd)/password":/password \
-v "$(pwd)/encrypted_private_key.json":/encrypted_private_key.json \
-it "ssvlabs/ssv-node:latest" make BUILD_PATH="/go/bin/ssvnode" start-node
Running in Background
This command shows container logs to verify startup. Press Ctrl-c to detach—the node will restart automatically due to --restart unless-stopped. To run in background, add -d after docker run.
Peer-to-peer Ports Configuration and Firewall
When you set up your firewall on your SSV node machine, make sure to expose the ports that you set in the container creation command. The defaults are 12001 UDP and 13001 TCP. Additional ones are 15000 TCP for Metrics and 16000 TCP for Health endpoint.
If you don't want to use the default ports, they can be changed in your config.yaml file. Be aware, they must be changed on the container creation command as well.
Best Practices
Ensure optimal performance and correctness of your node by following recommendations such as multiple endpoints for failover for EL and CL clients, ./data/db folder backup, weighted attestation data, parallel submissions, and Doppelganger protection to prevent double-signing.
The complete guide can be found here ↗.
Step 3: Register on SSV Network
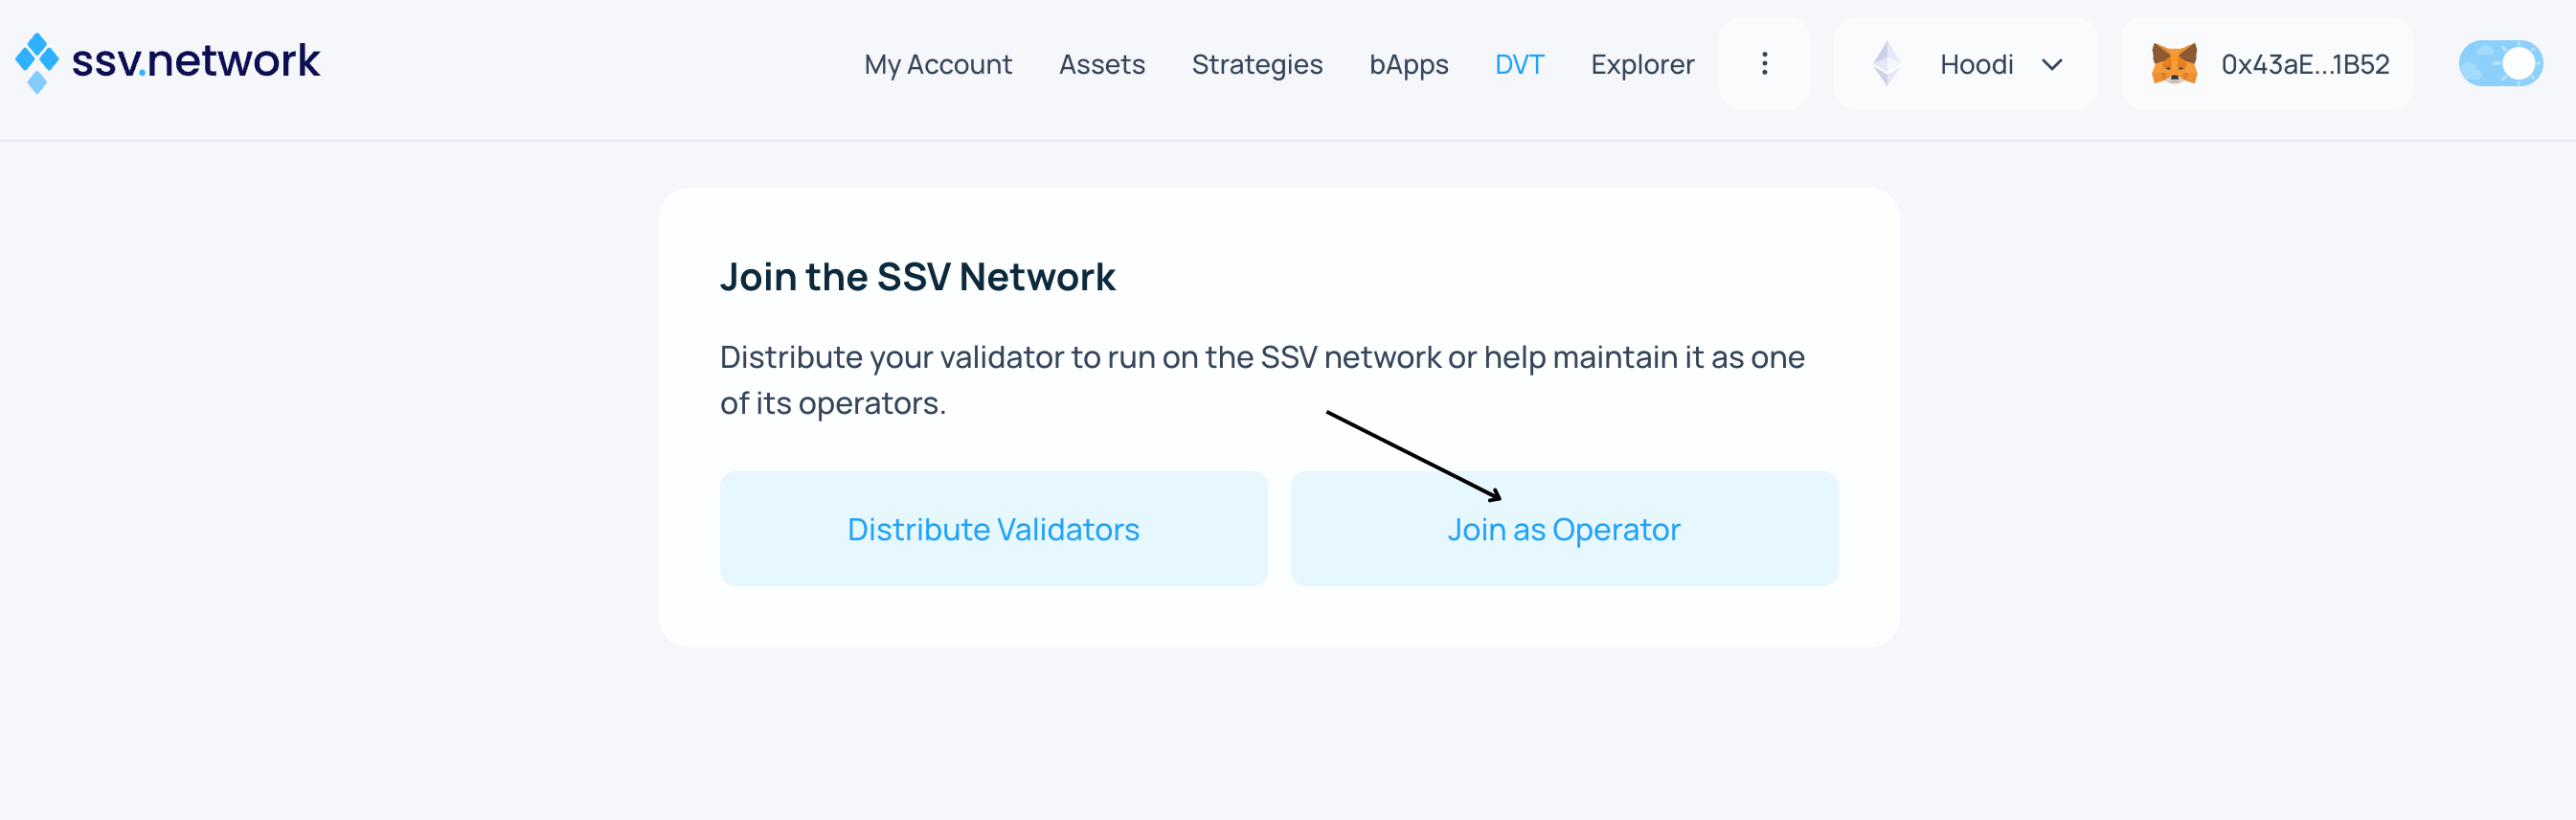
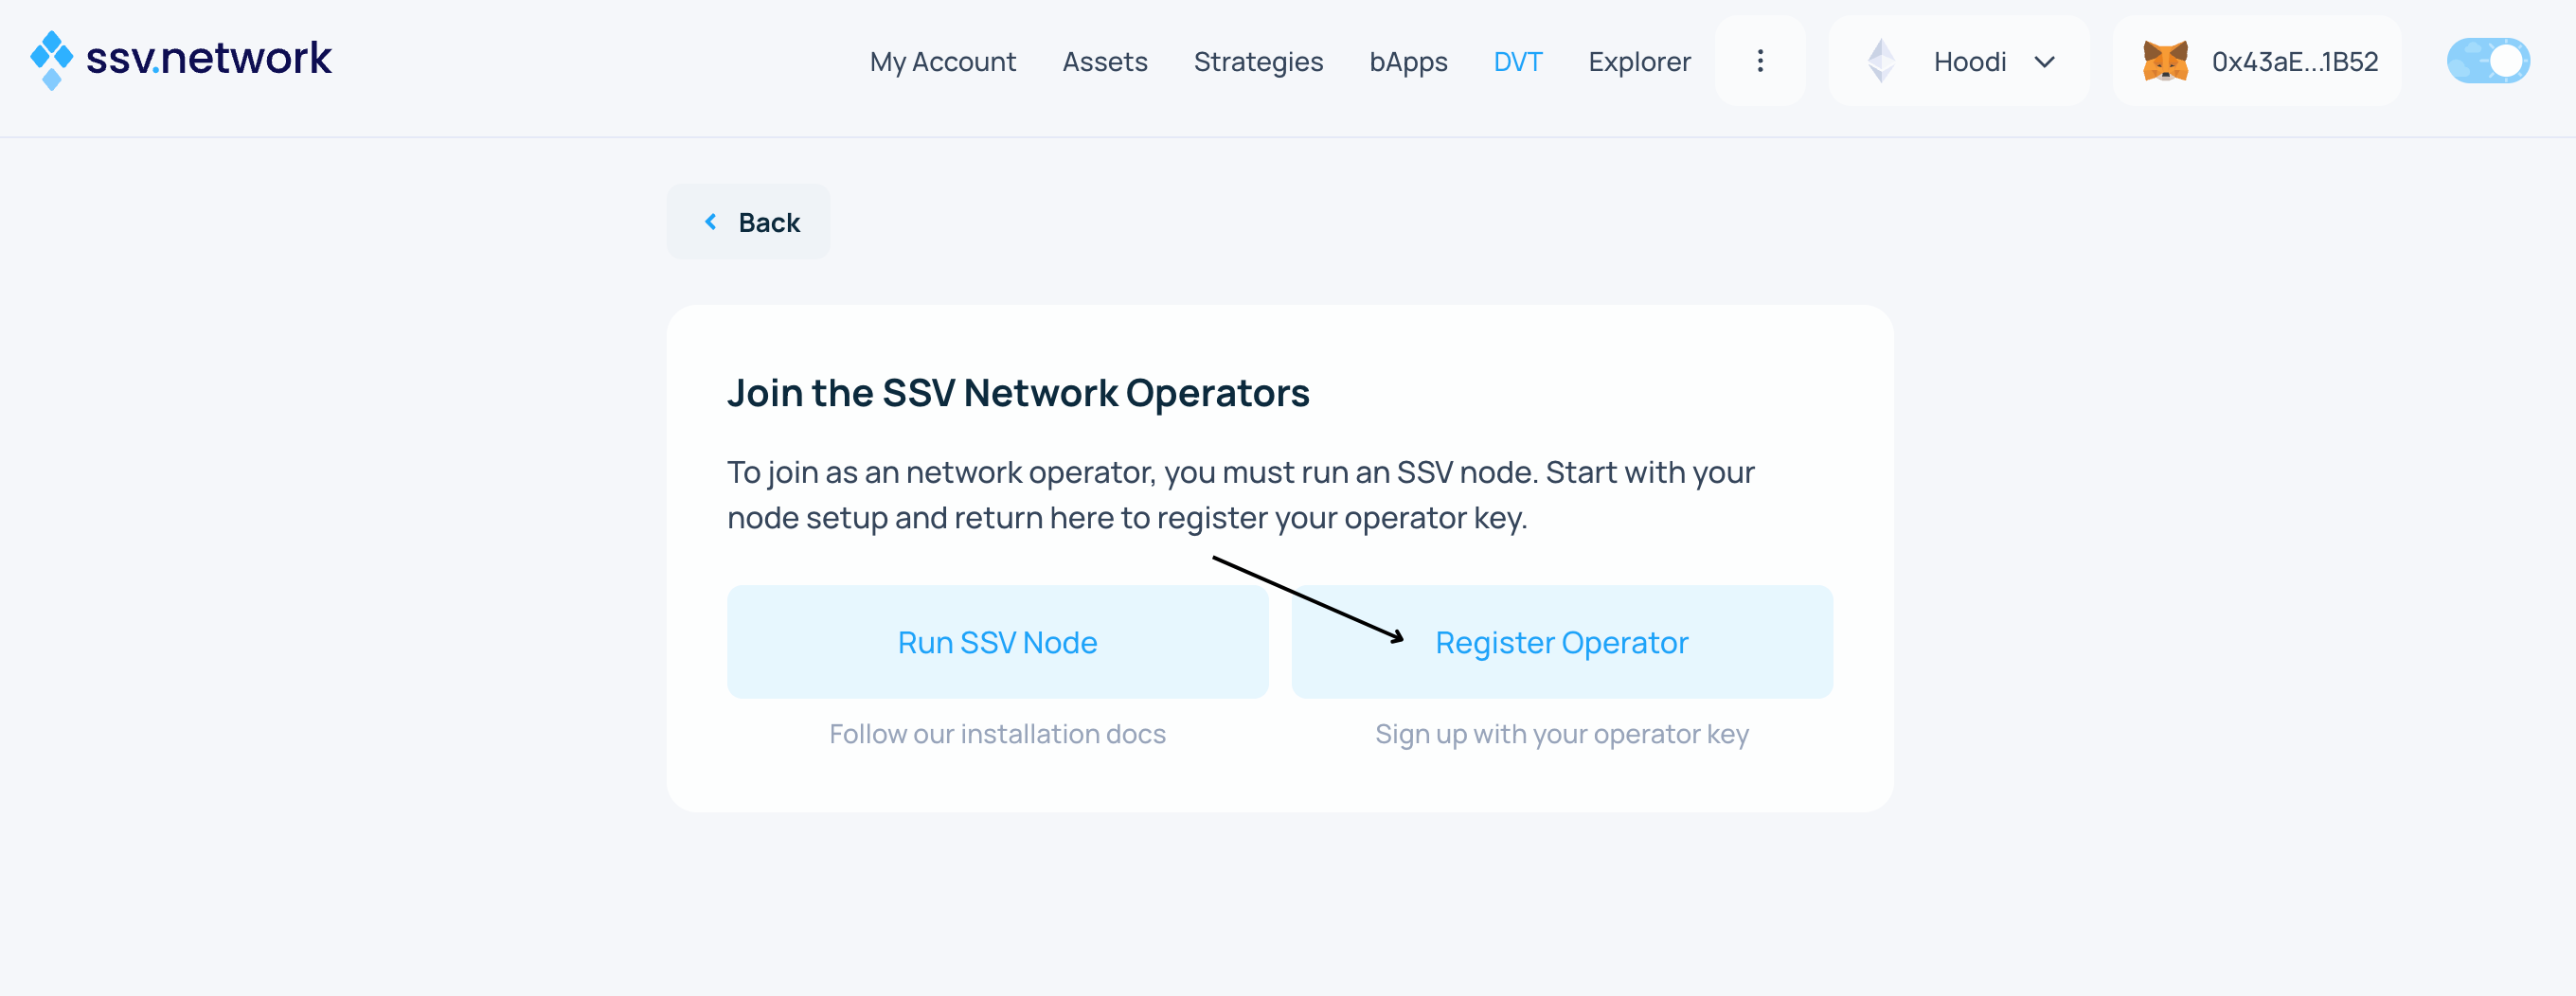
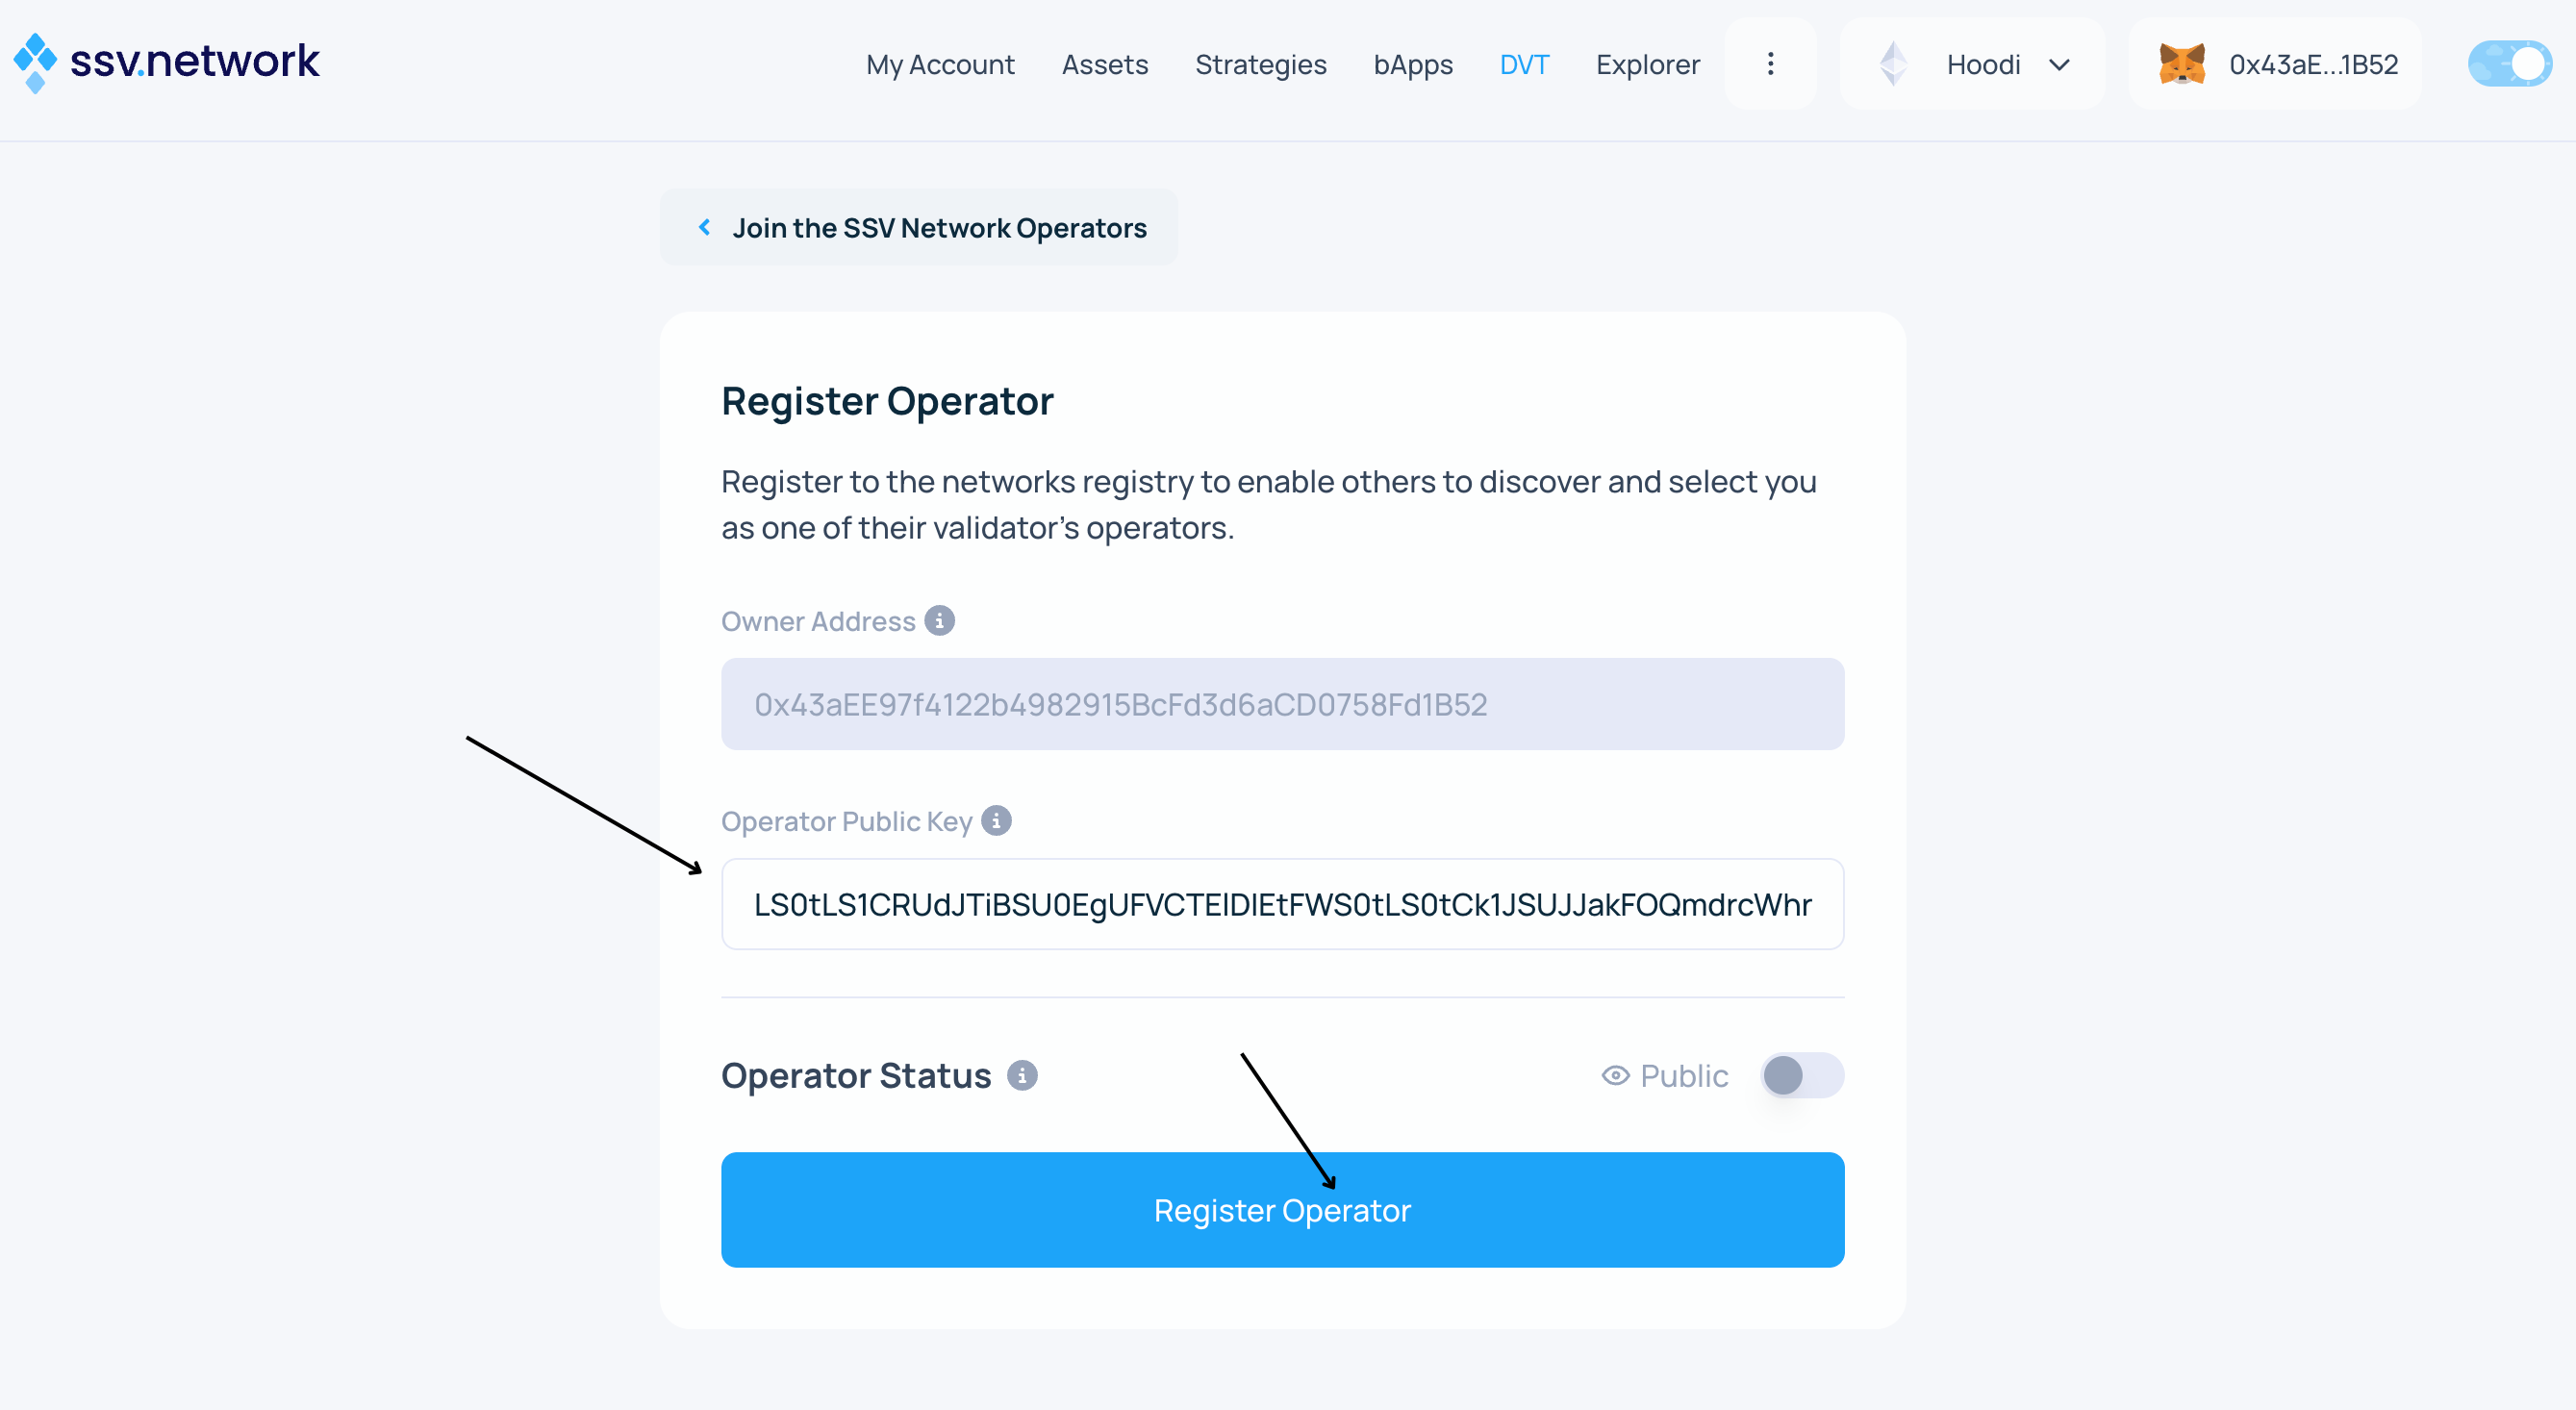
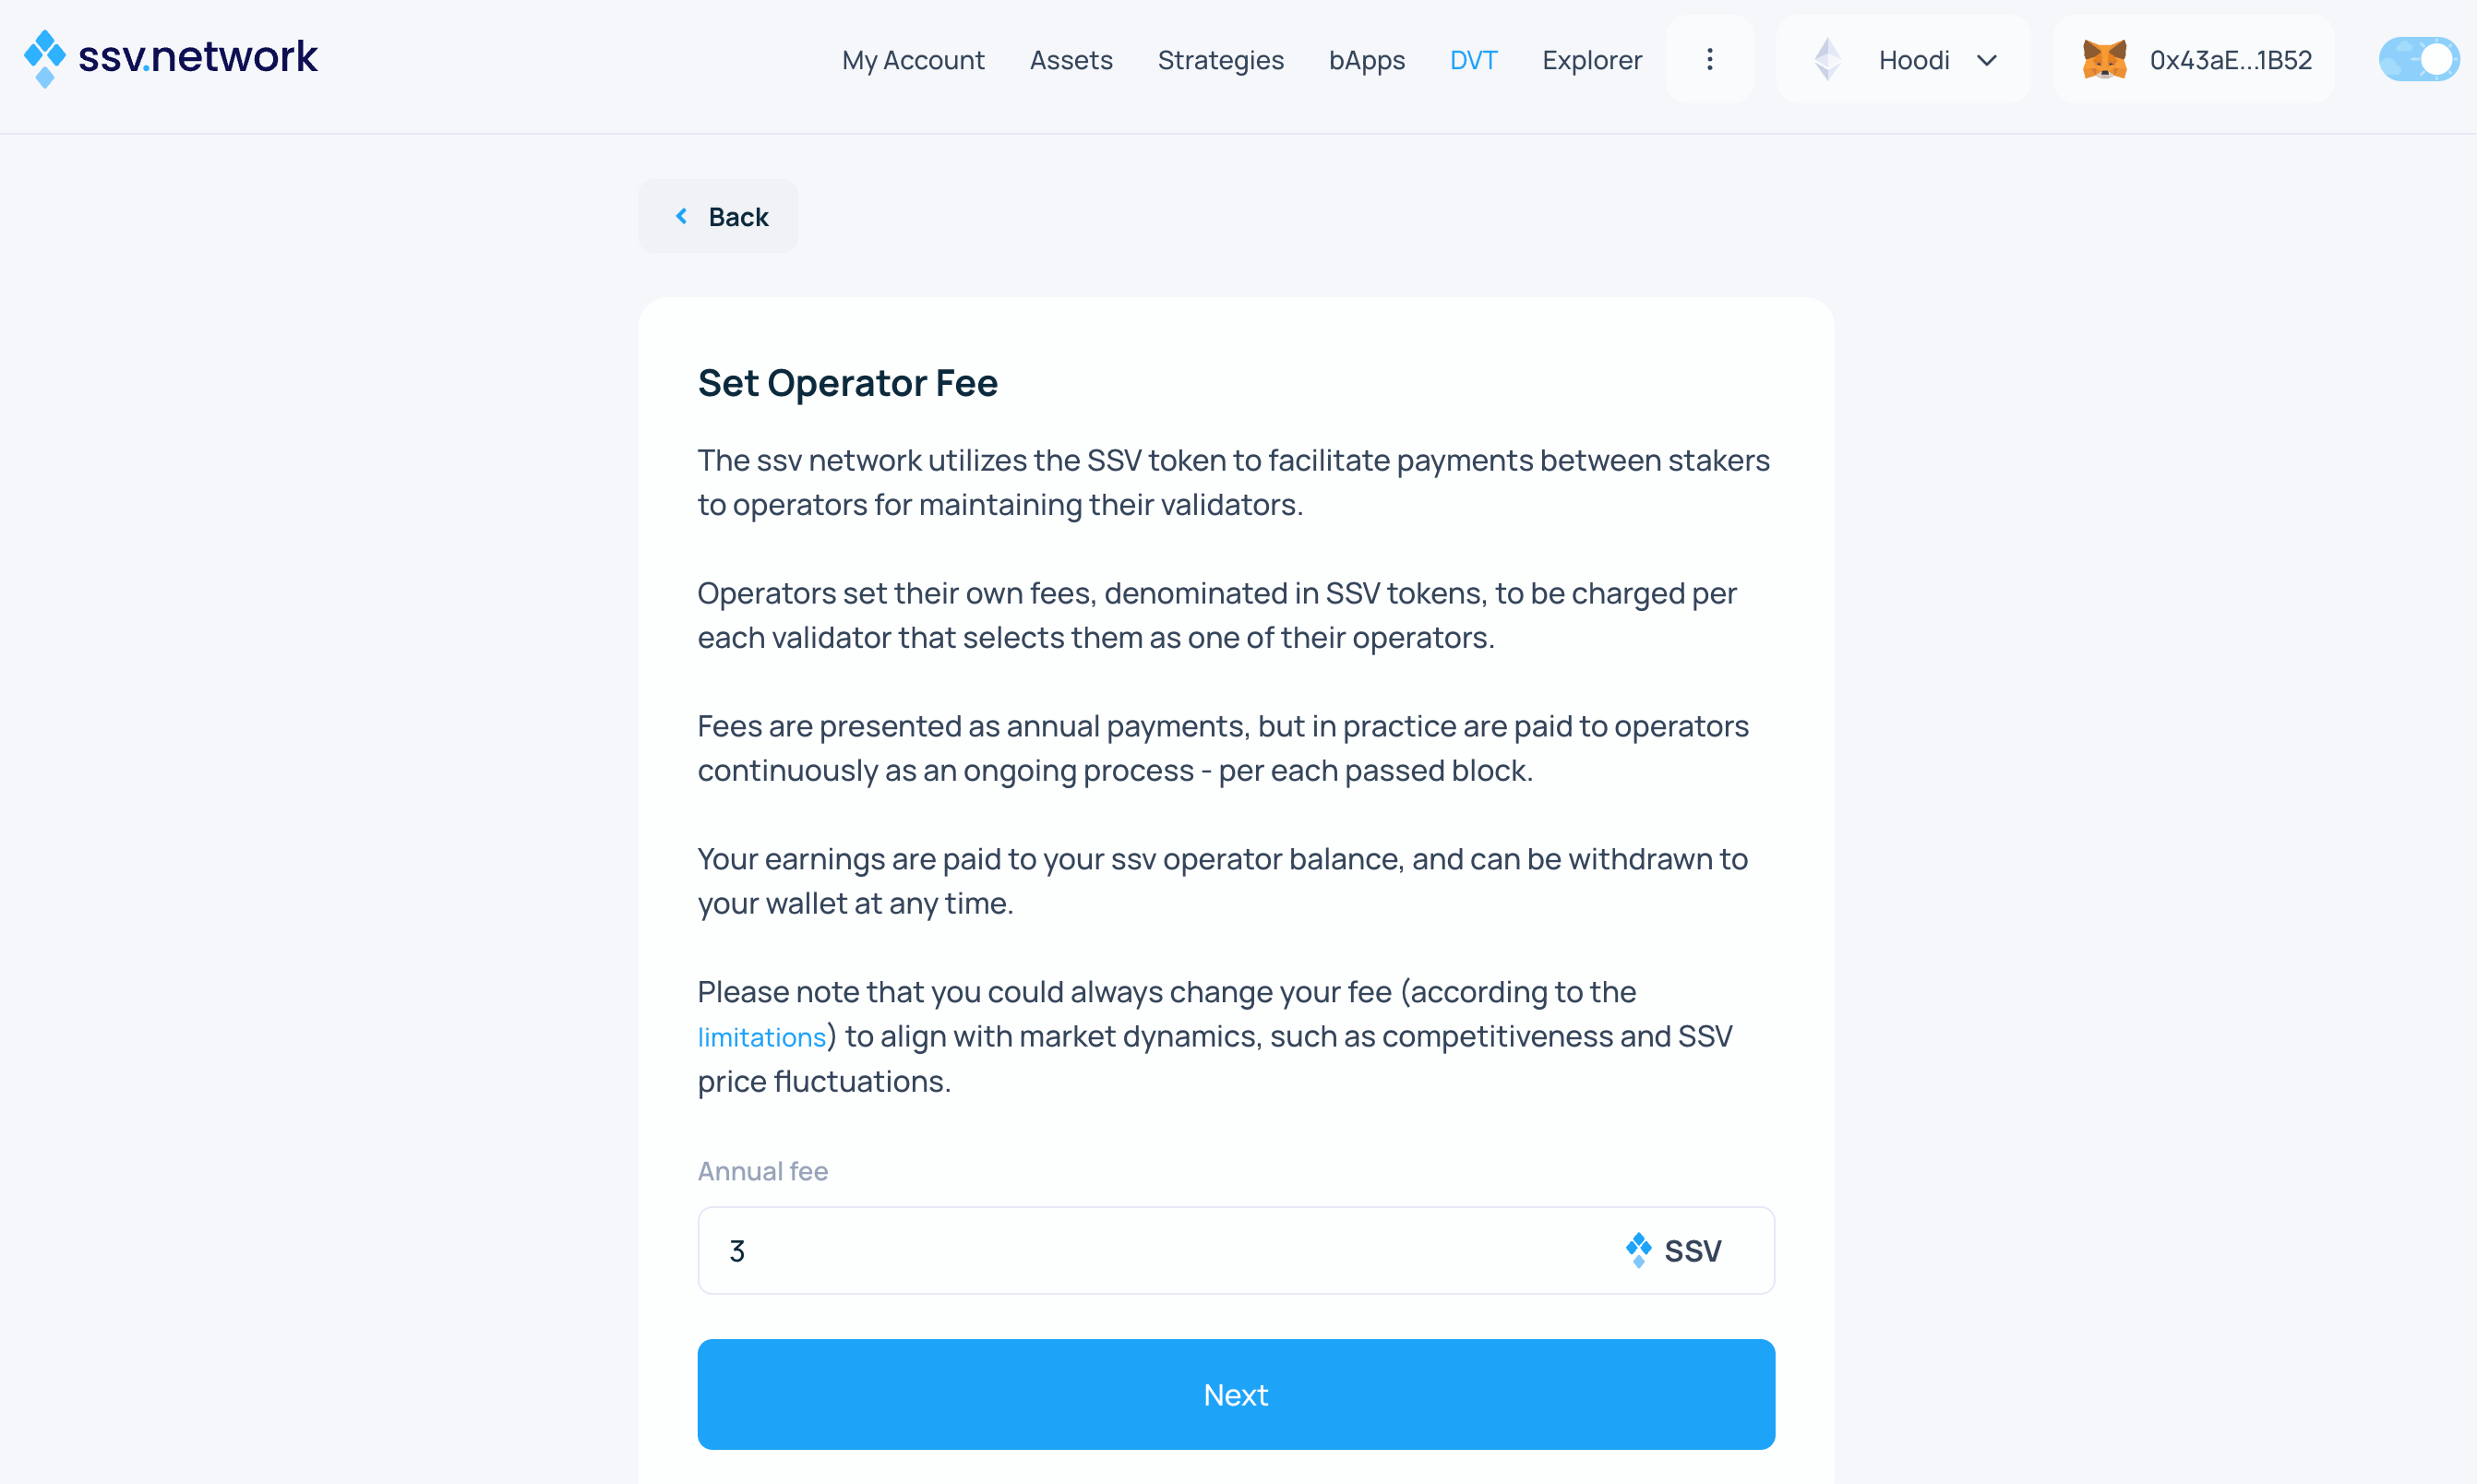
After successfully running an SSV node, an operator must register it to the SSV Network in order to be discoverable by validators. You'll need your operator public key (generated in Step 1) and your desired operator fee (more on fees ↗). The wallet address you use to register will be the only address with management permissions. Follow these steps using the SSV Network web app ↗:
- Click Join As Operator
- Click Register Operator
- Paste your Operator Public Key from the previous step and click Register Operator
- Set Operator Annual fee and click Next
Operator Fee
Your fee (in SSV tokens) is charged per validator that selects you. Earnings accumulate in your balance and can be withdrawn anytime. You can update your fee later—decreases take effect immediately, increases require a waiting period to protect stakers ↗.
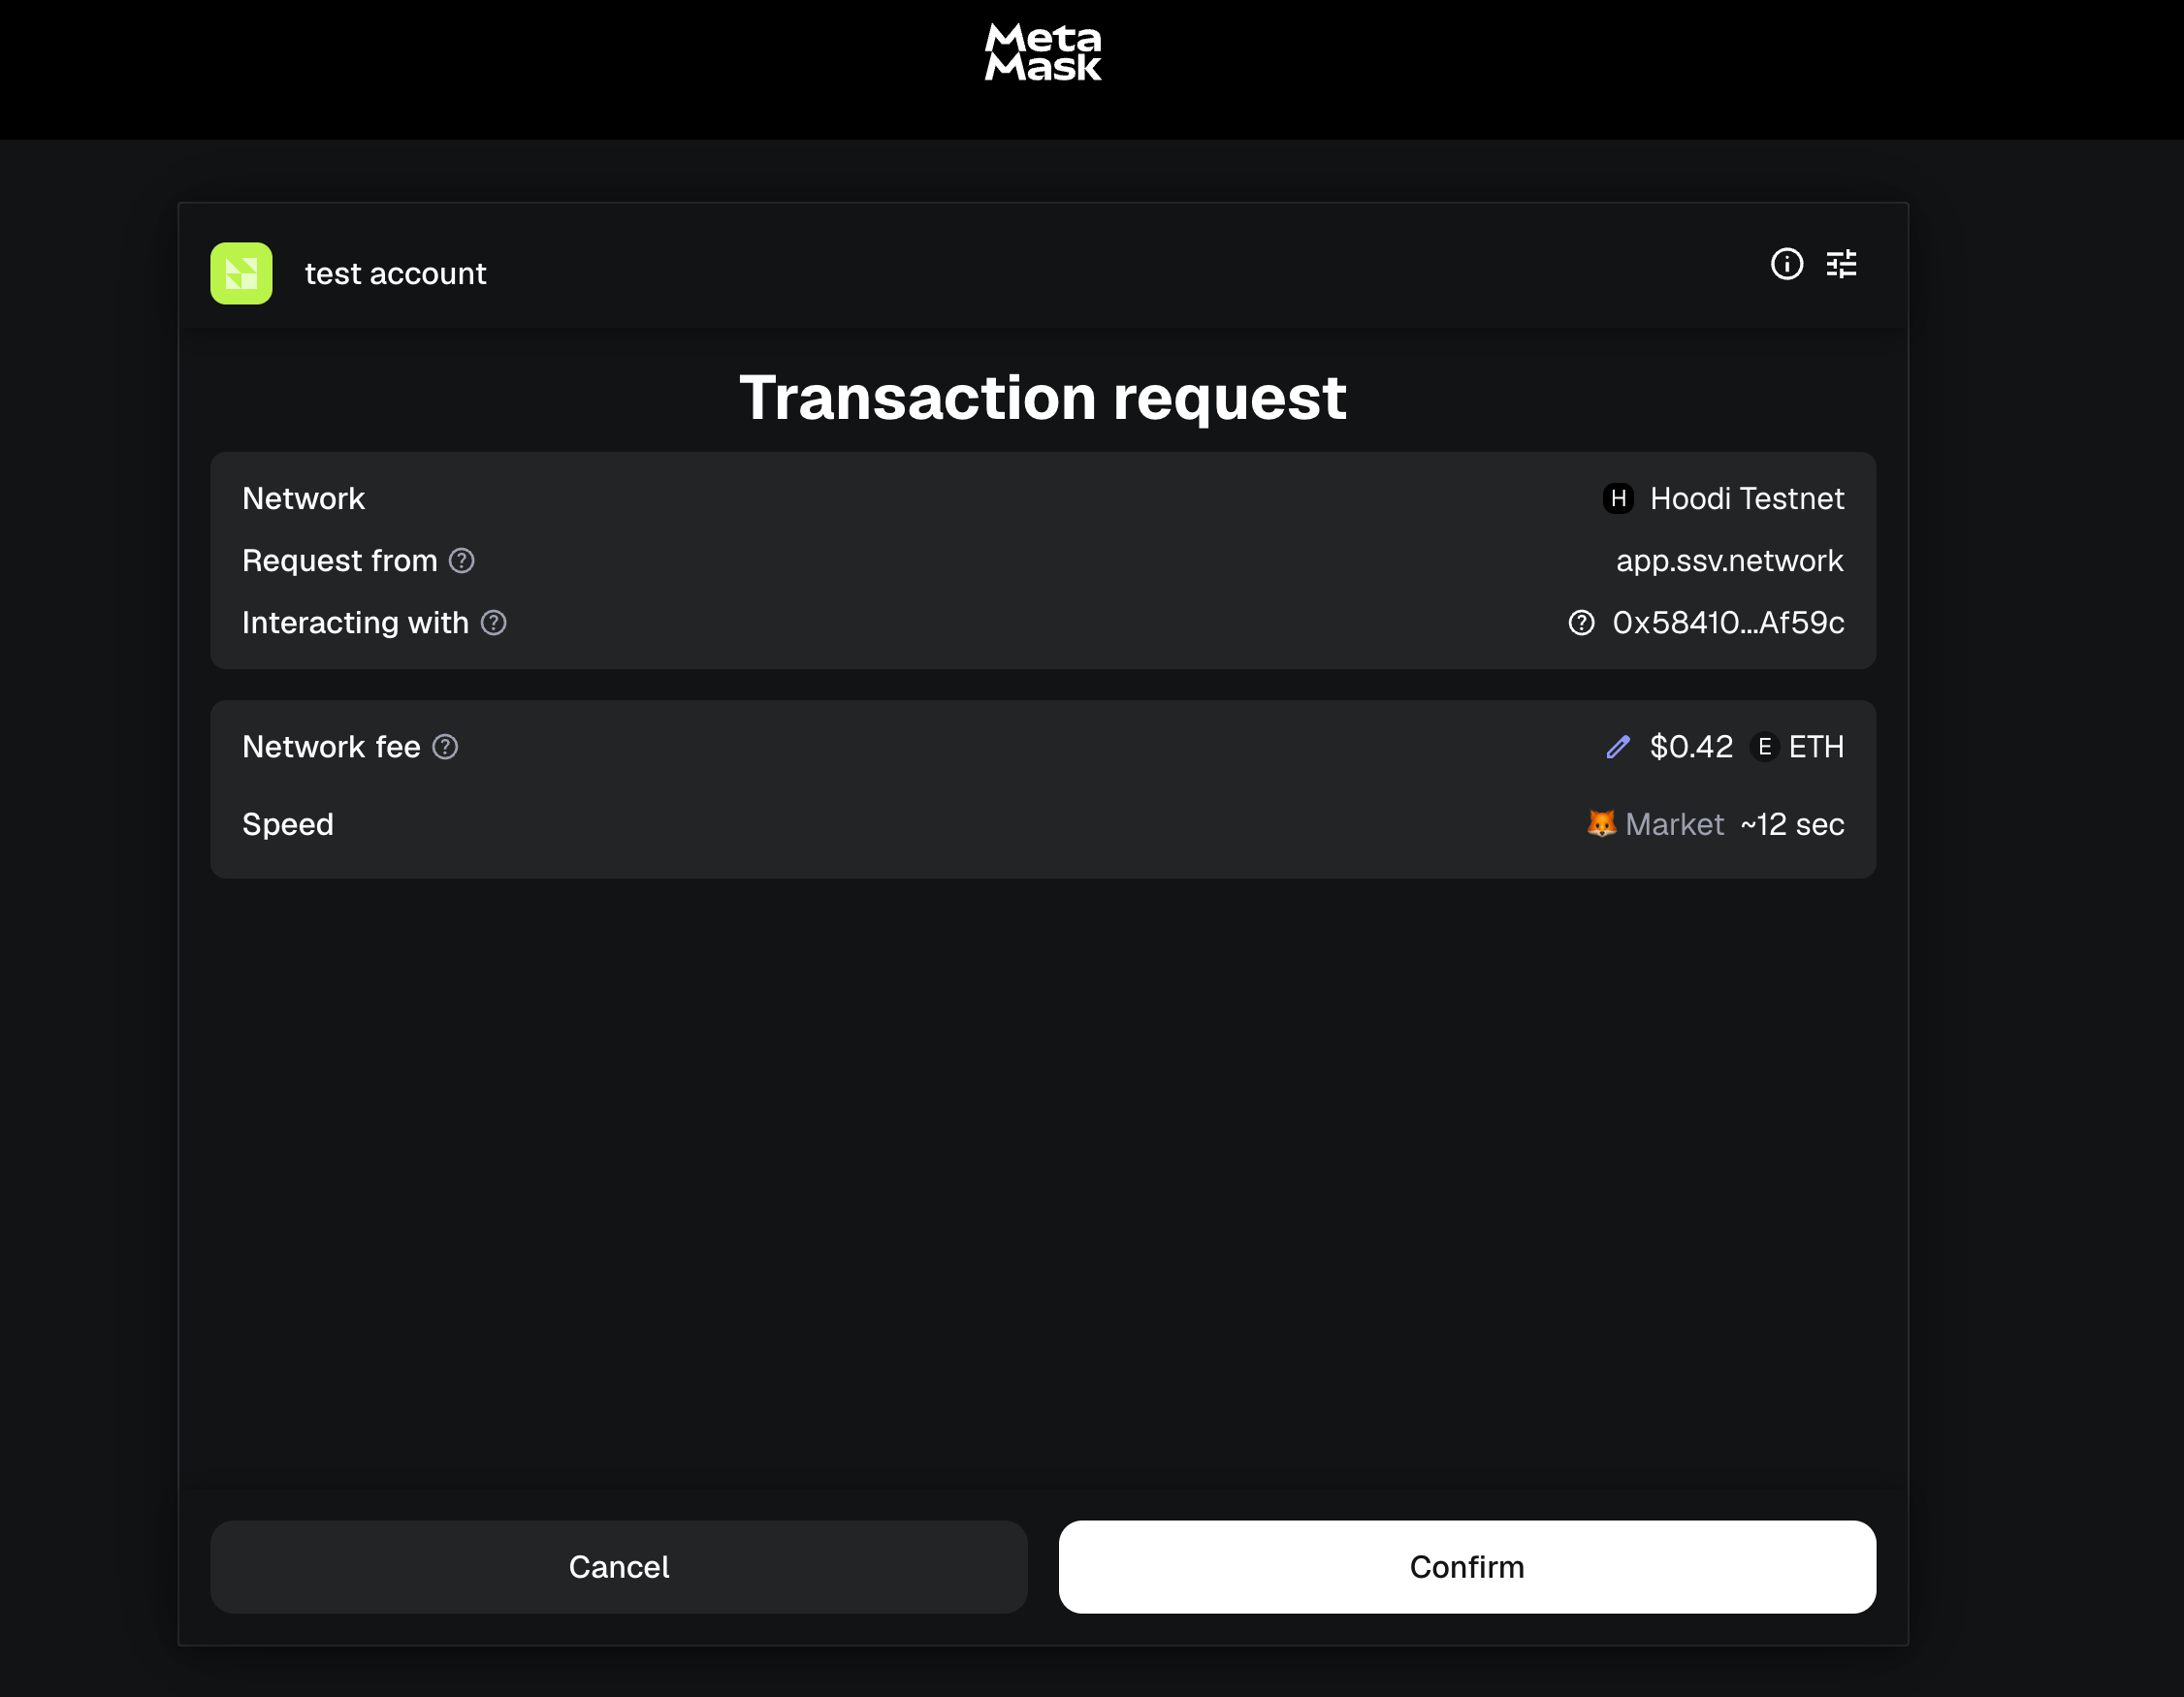
- Double-check everything and click Confirm
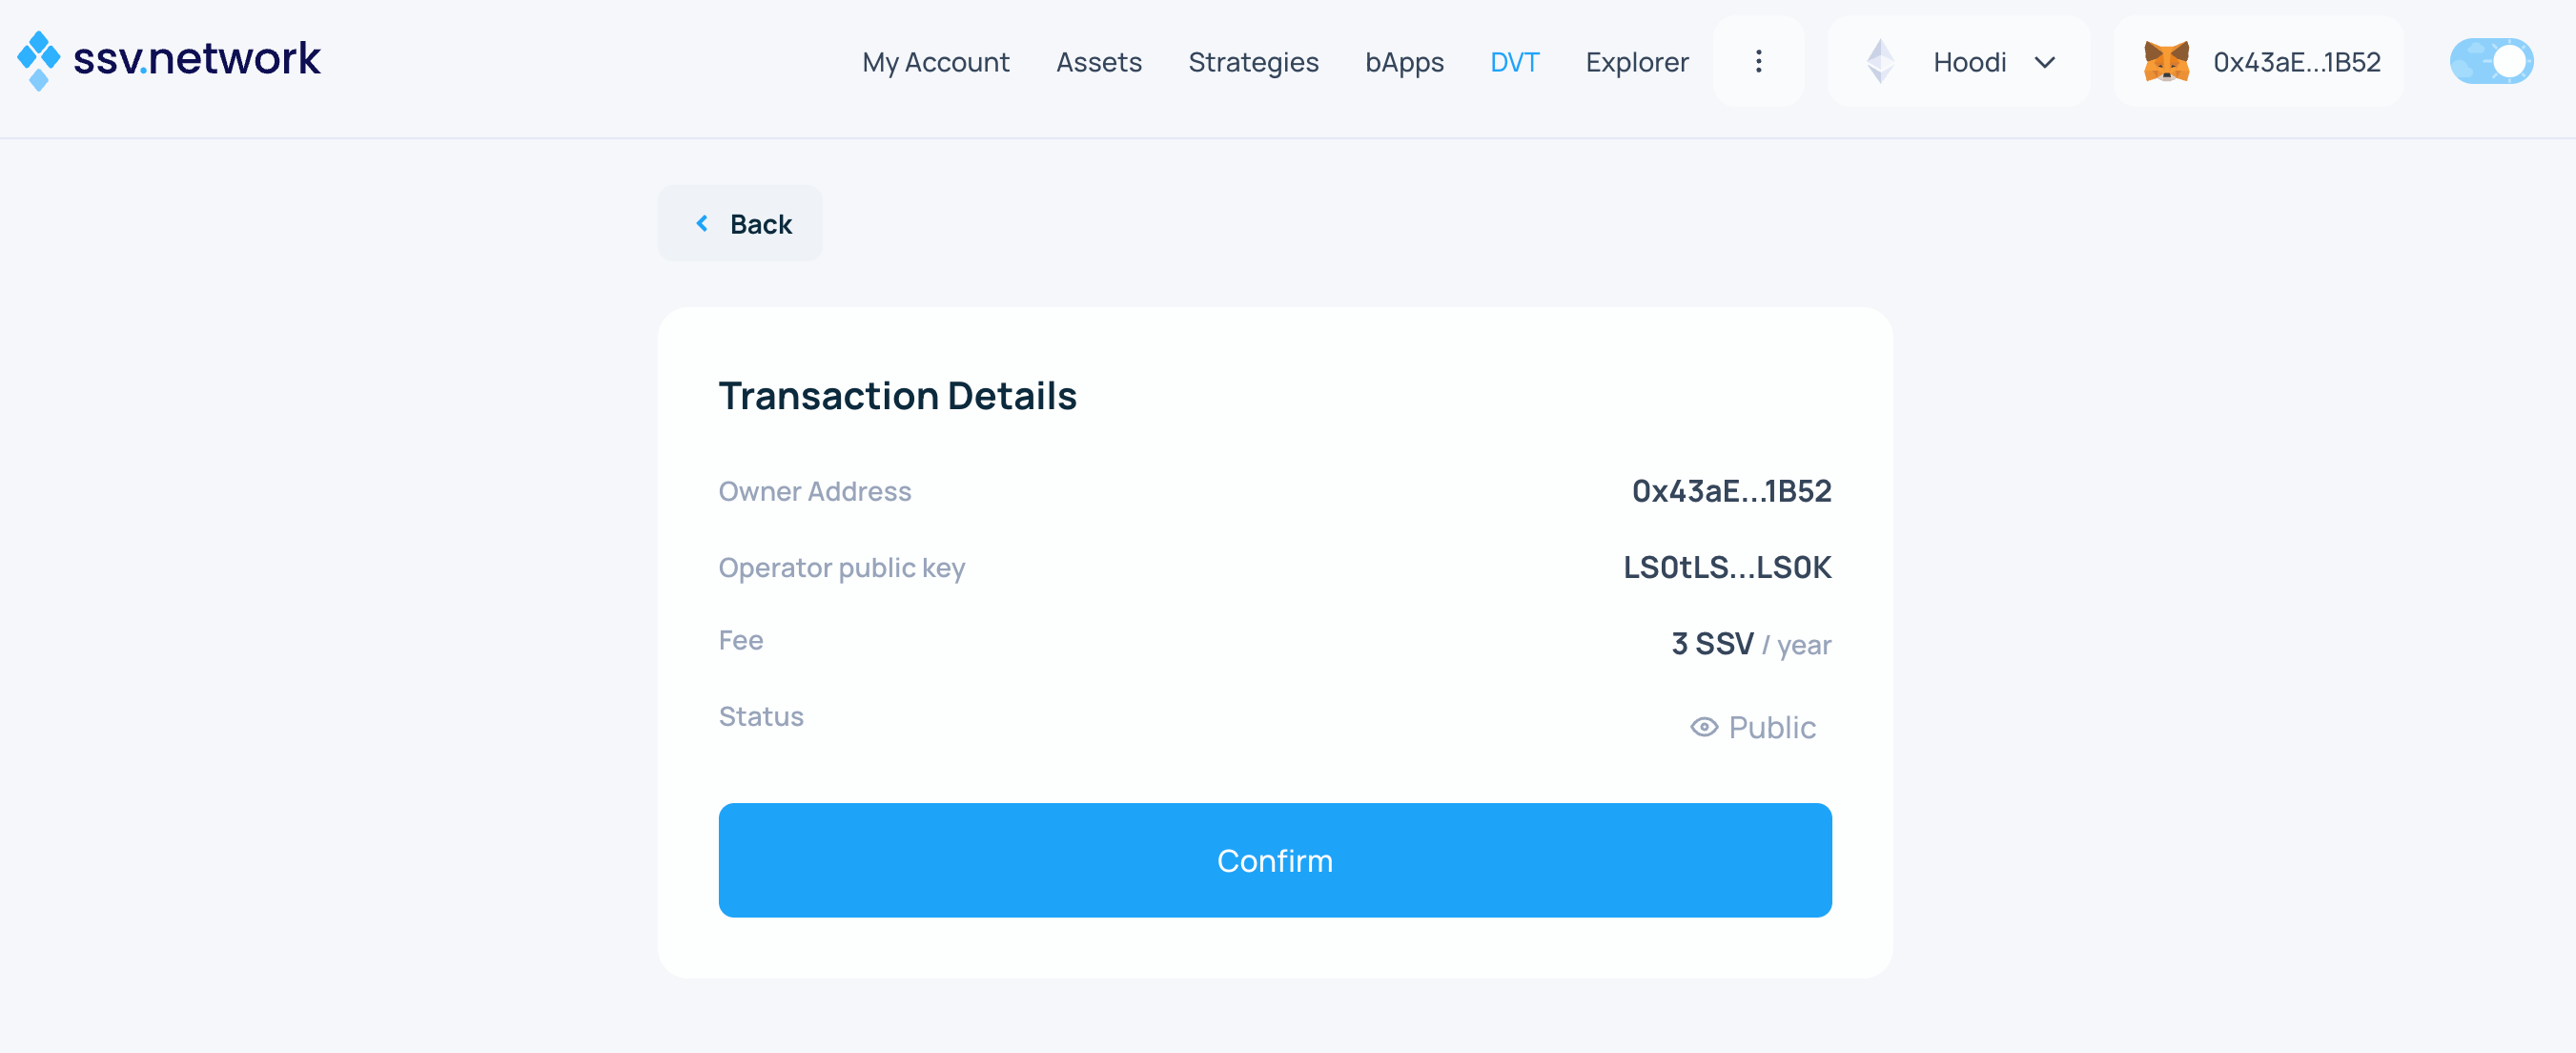
- Confirm the transaction and wait for it to be processed
- Congratulations 🥳. Your Operator is successfully registered, and stakers can now choose it to operate their validators.

Operator Management
Once registered, you can apply for the Verified Operator Program ↗ to earn this badge  and signal trustworthiness to stakers. You can also set operator metadata ↗ like description and name, update fees ↗, enable permissioned mode ↗ to restrict validator registration to whitelisted addresses only, and more ↗.
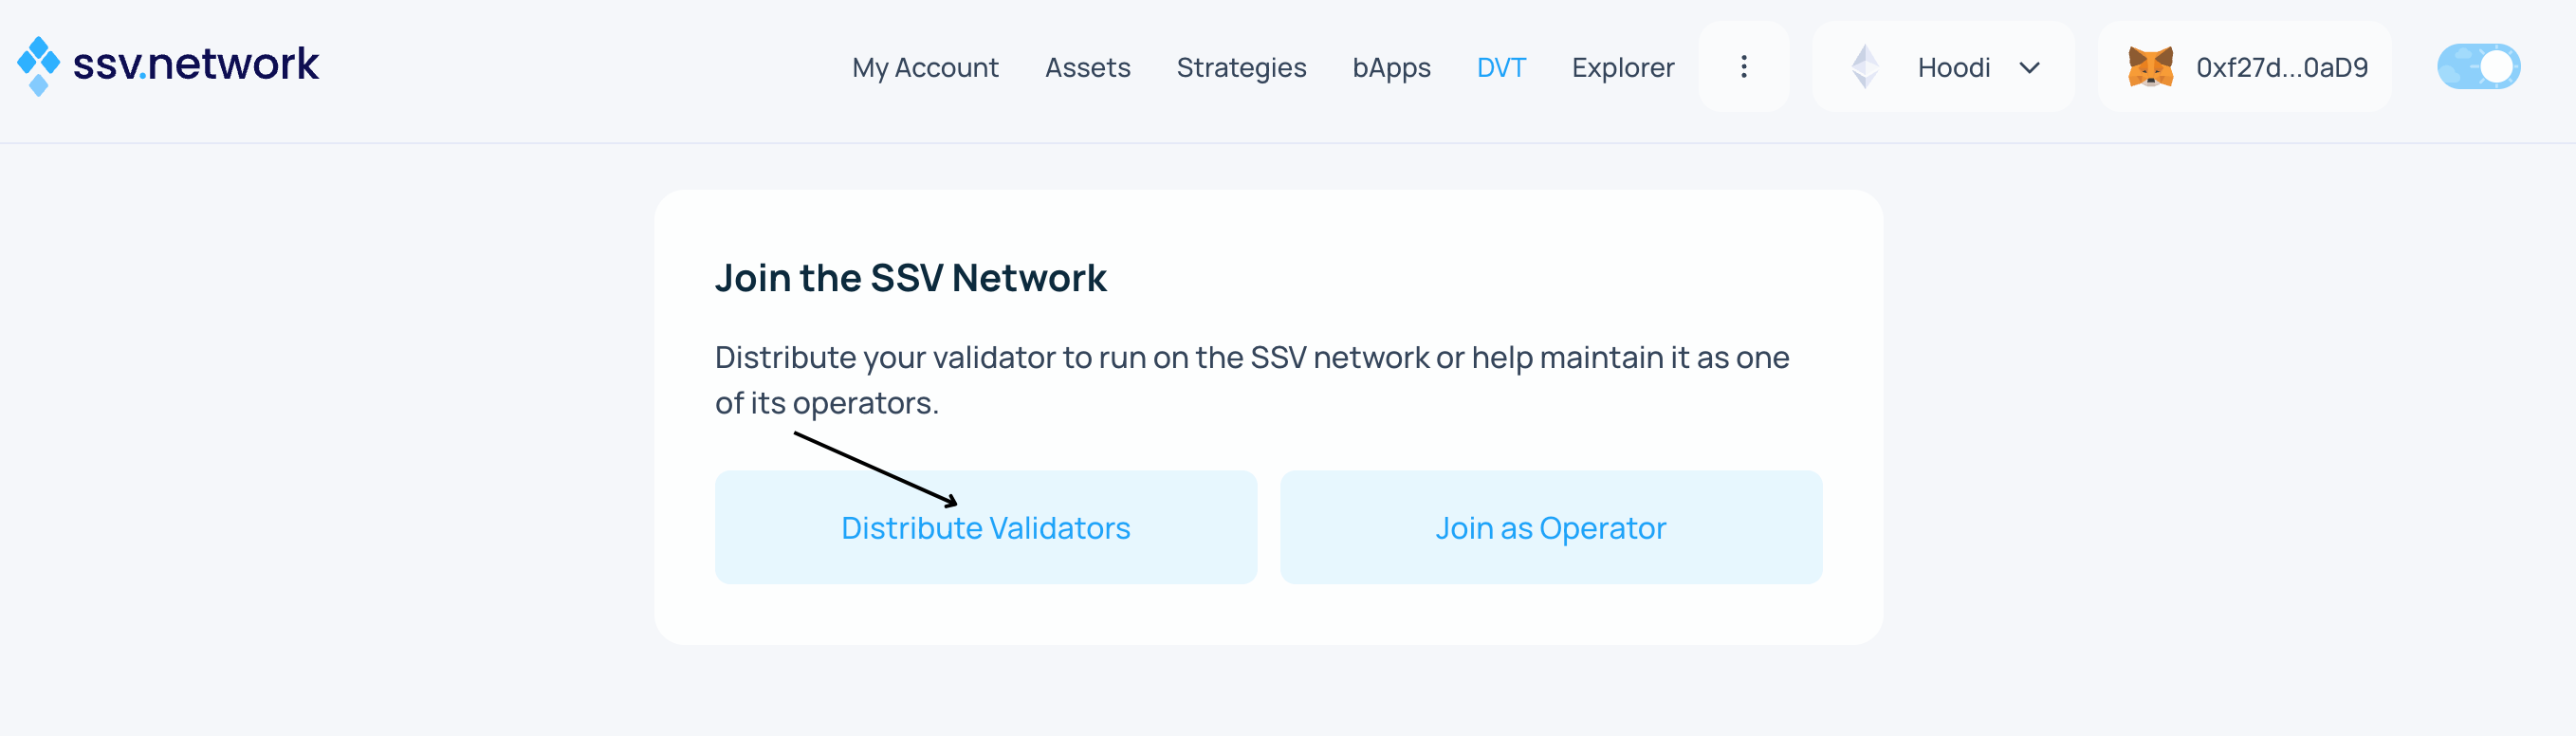
Split Validator Keys Among Operators
This section walks you through distributing your StakeWise validator keys to a cluster of SSV operators using the SSV webapp. The process involves selecting operators, generating encrypted keyshares offline using the CLI, and completing registration through the webapp.
Select Operators and Generate Keyshares
- Download the ssv-keys CLI for your system from the releases page ↗
# macOS
curl -L https://github.com/ssvlabs/ssv-keys/releases/latest/download/ssv-keys-mac -o ssv-keys
chmod +x ssv-keys  # Make the file executable

# Linux
curl -L https://github.com/ssvlabs/ssv-keys/releases/latest/download/ssv-keys-linux -o ssv-keys
chmod +x ssv-keys
- Press Distribute Validators
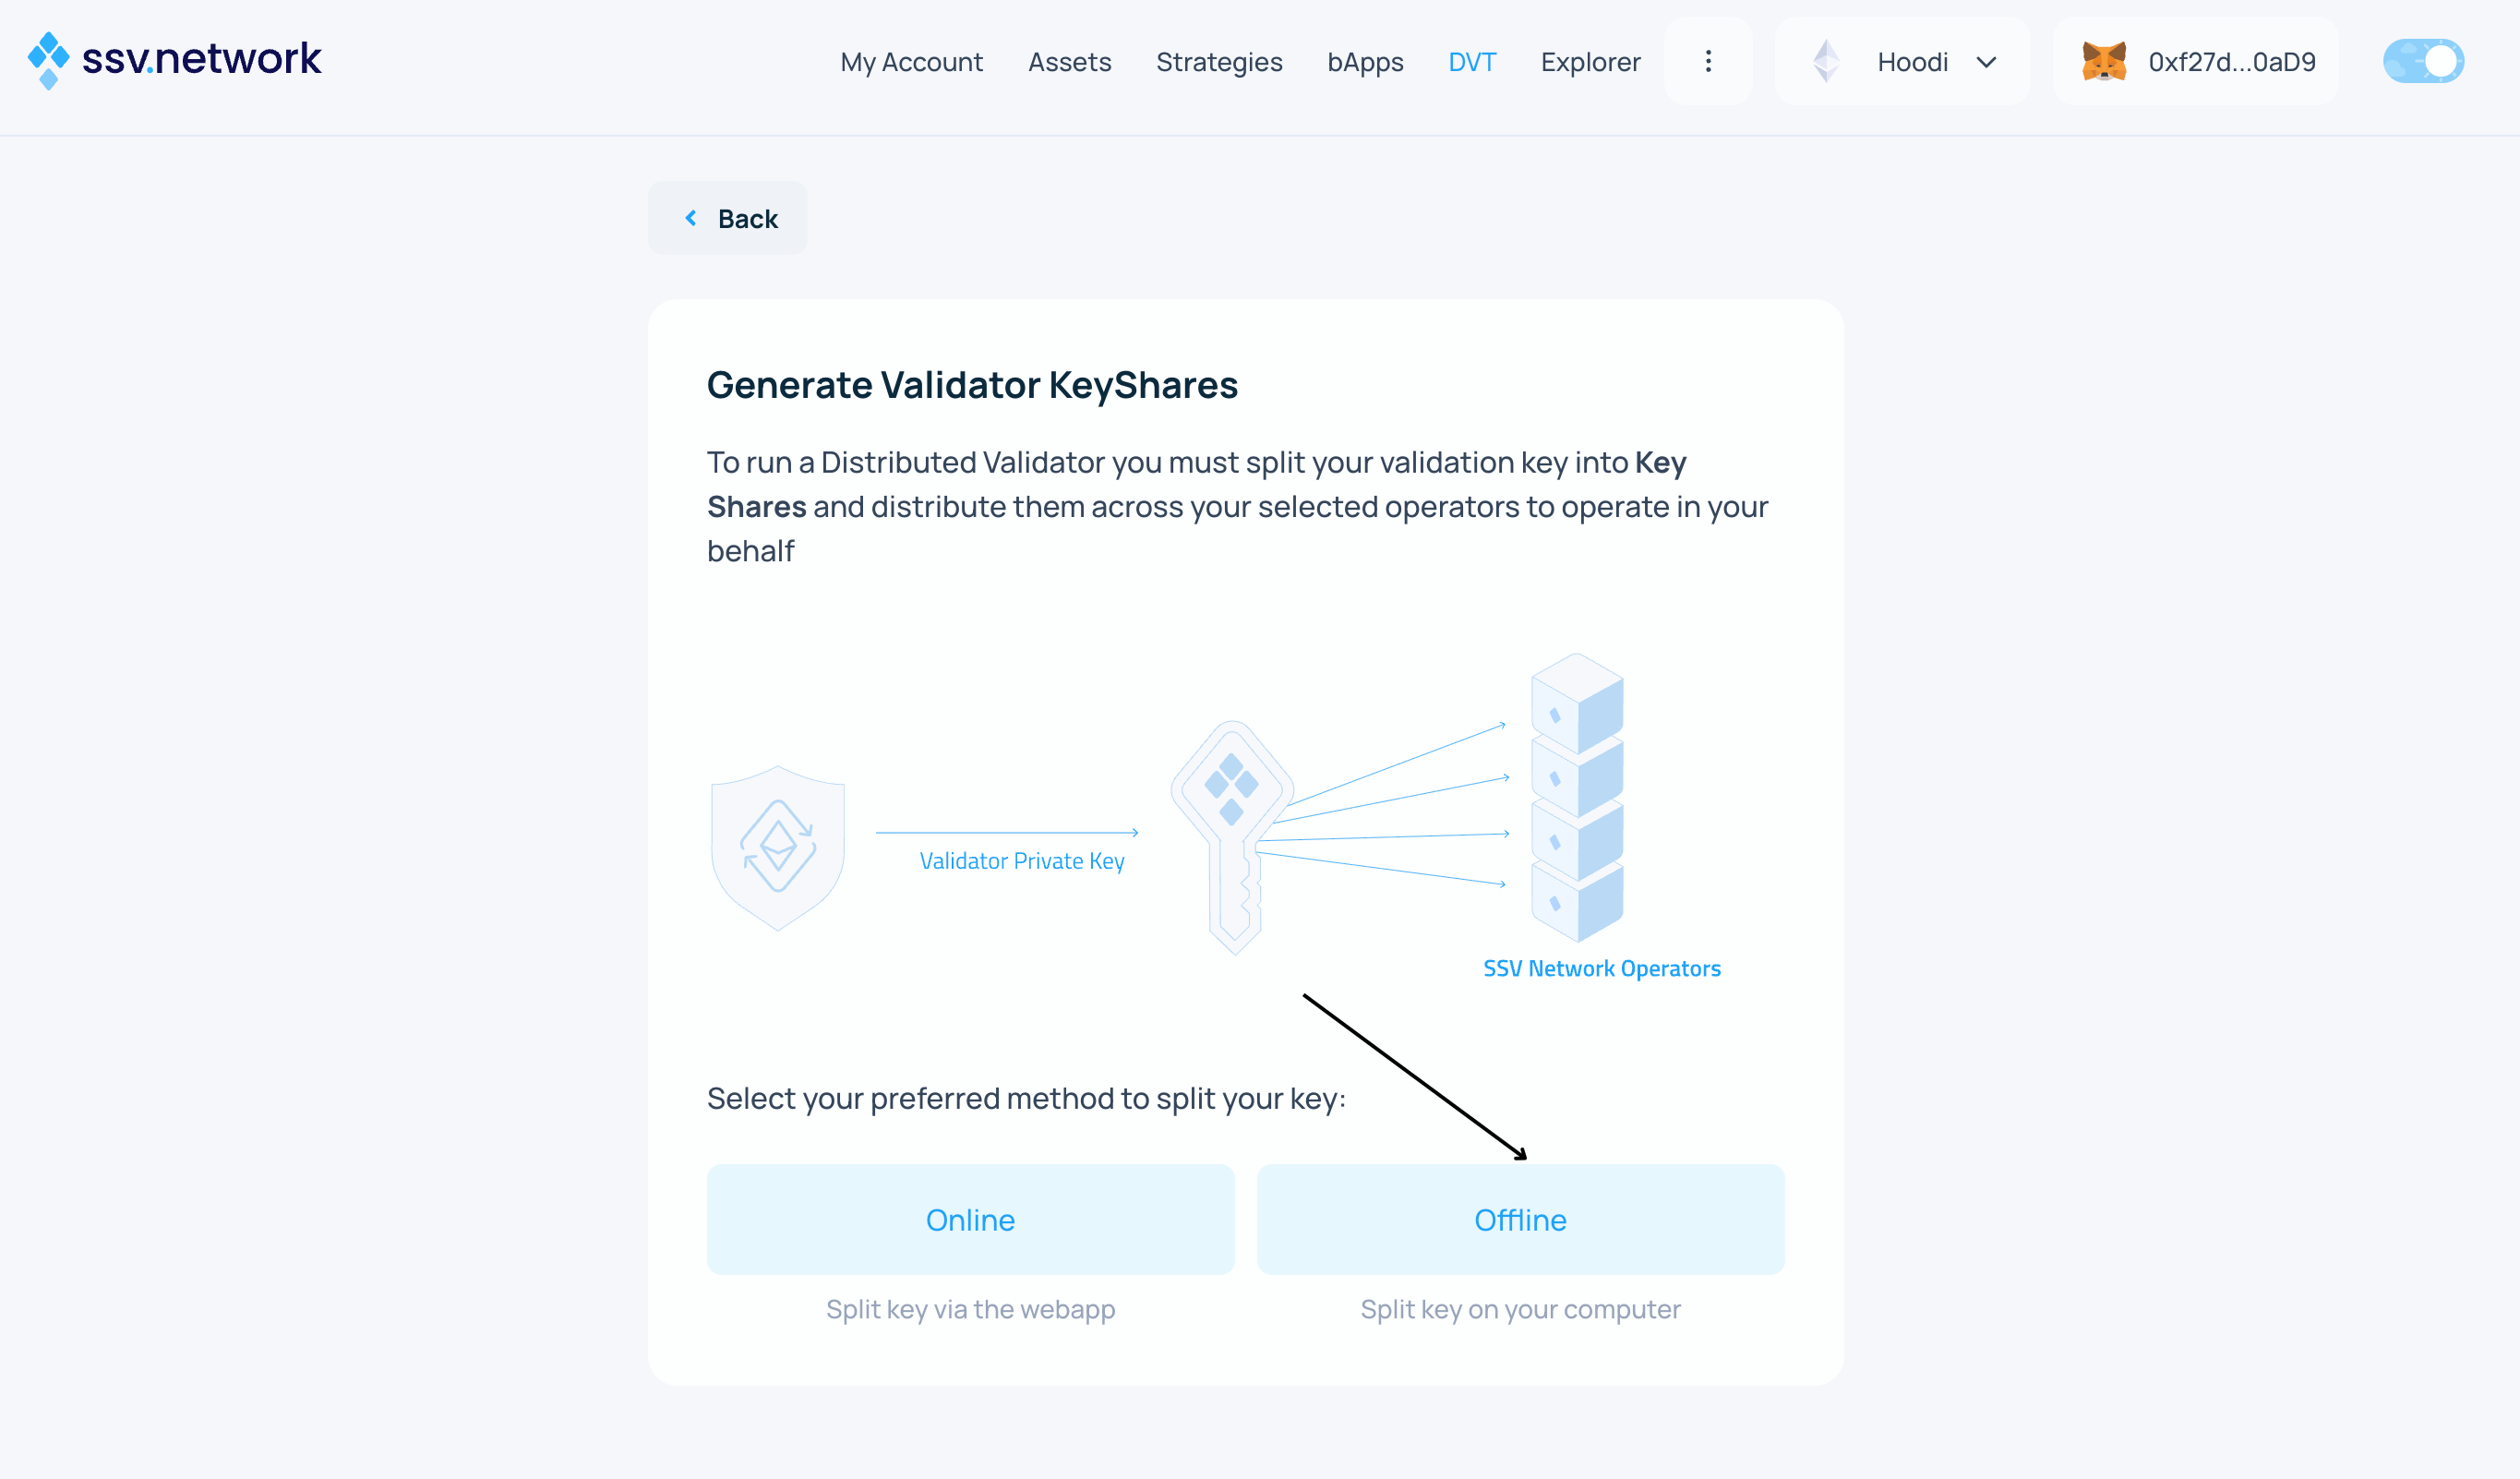
- Select Generate new key shares

- Choose the cluster size and operators to run your validator, and click Next

- Select the Offline method to split your key
- Select Command Line Interface, copy the command provided with all values pre-filled (operator keys, IDs, your wallet address, and nonce), and press Next
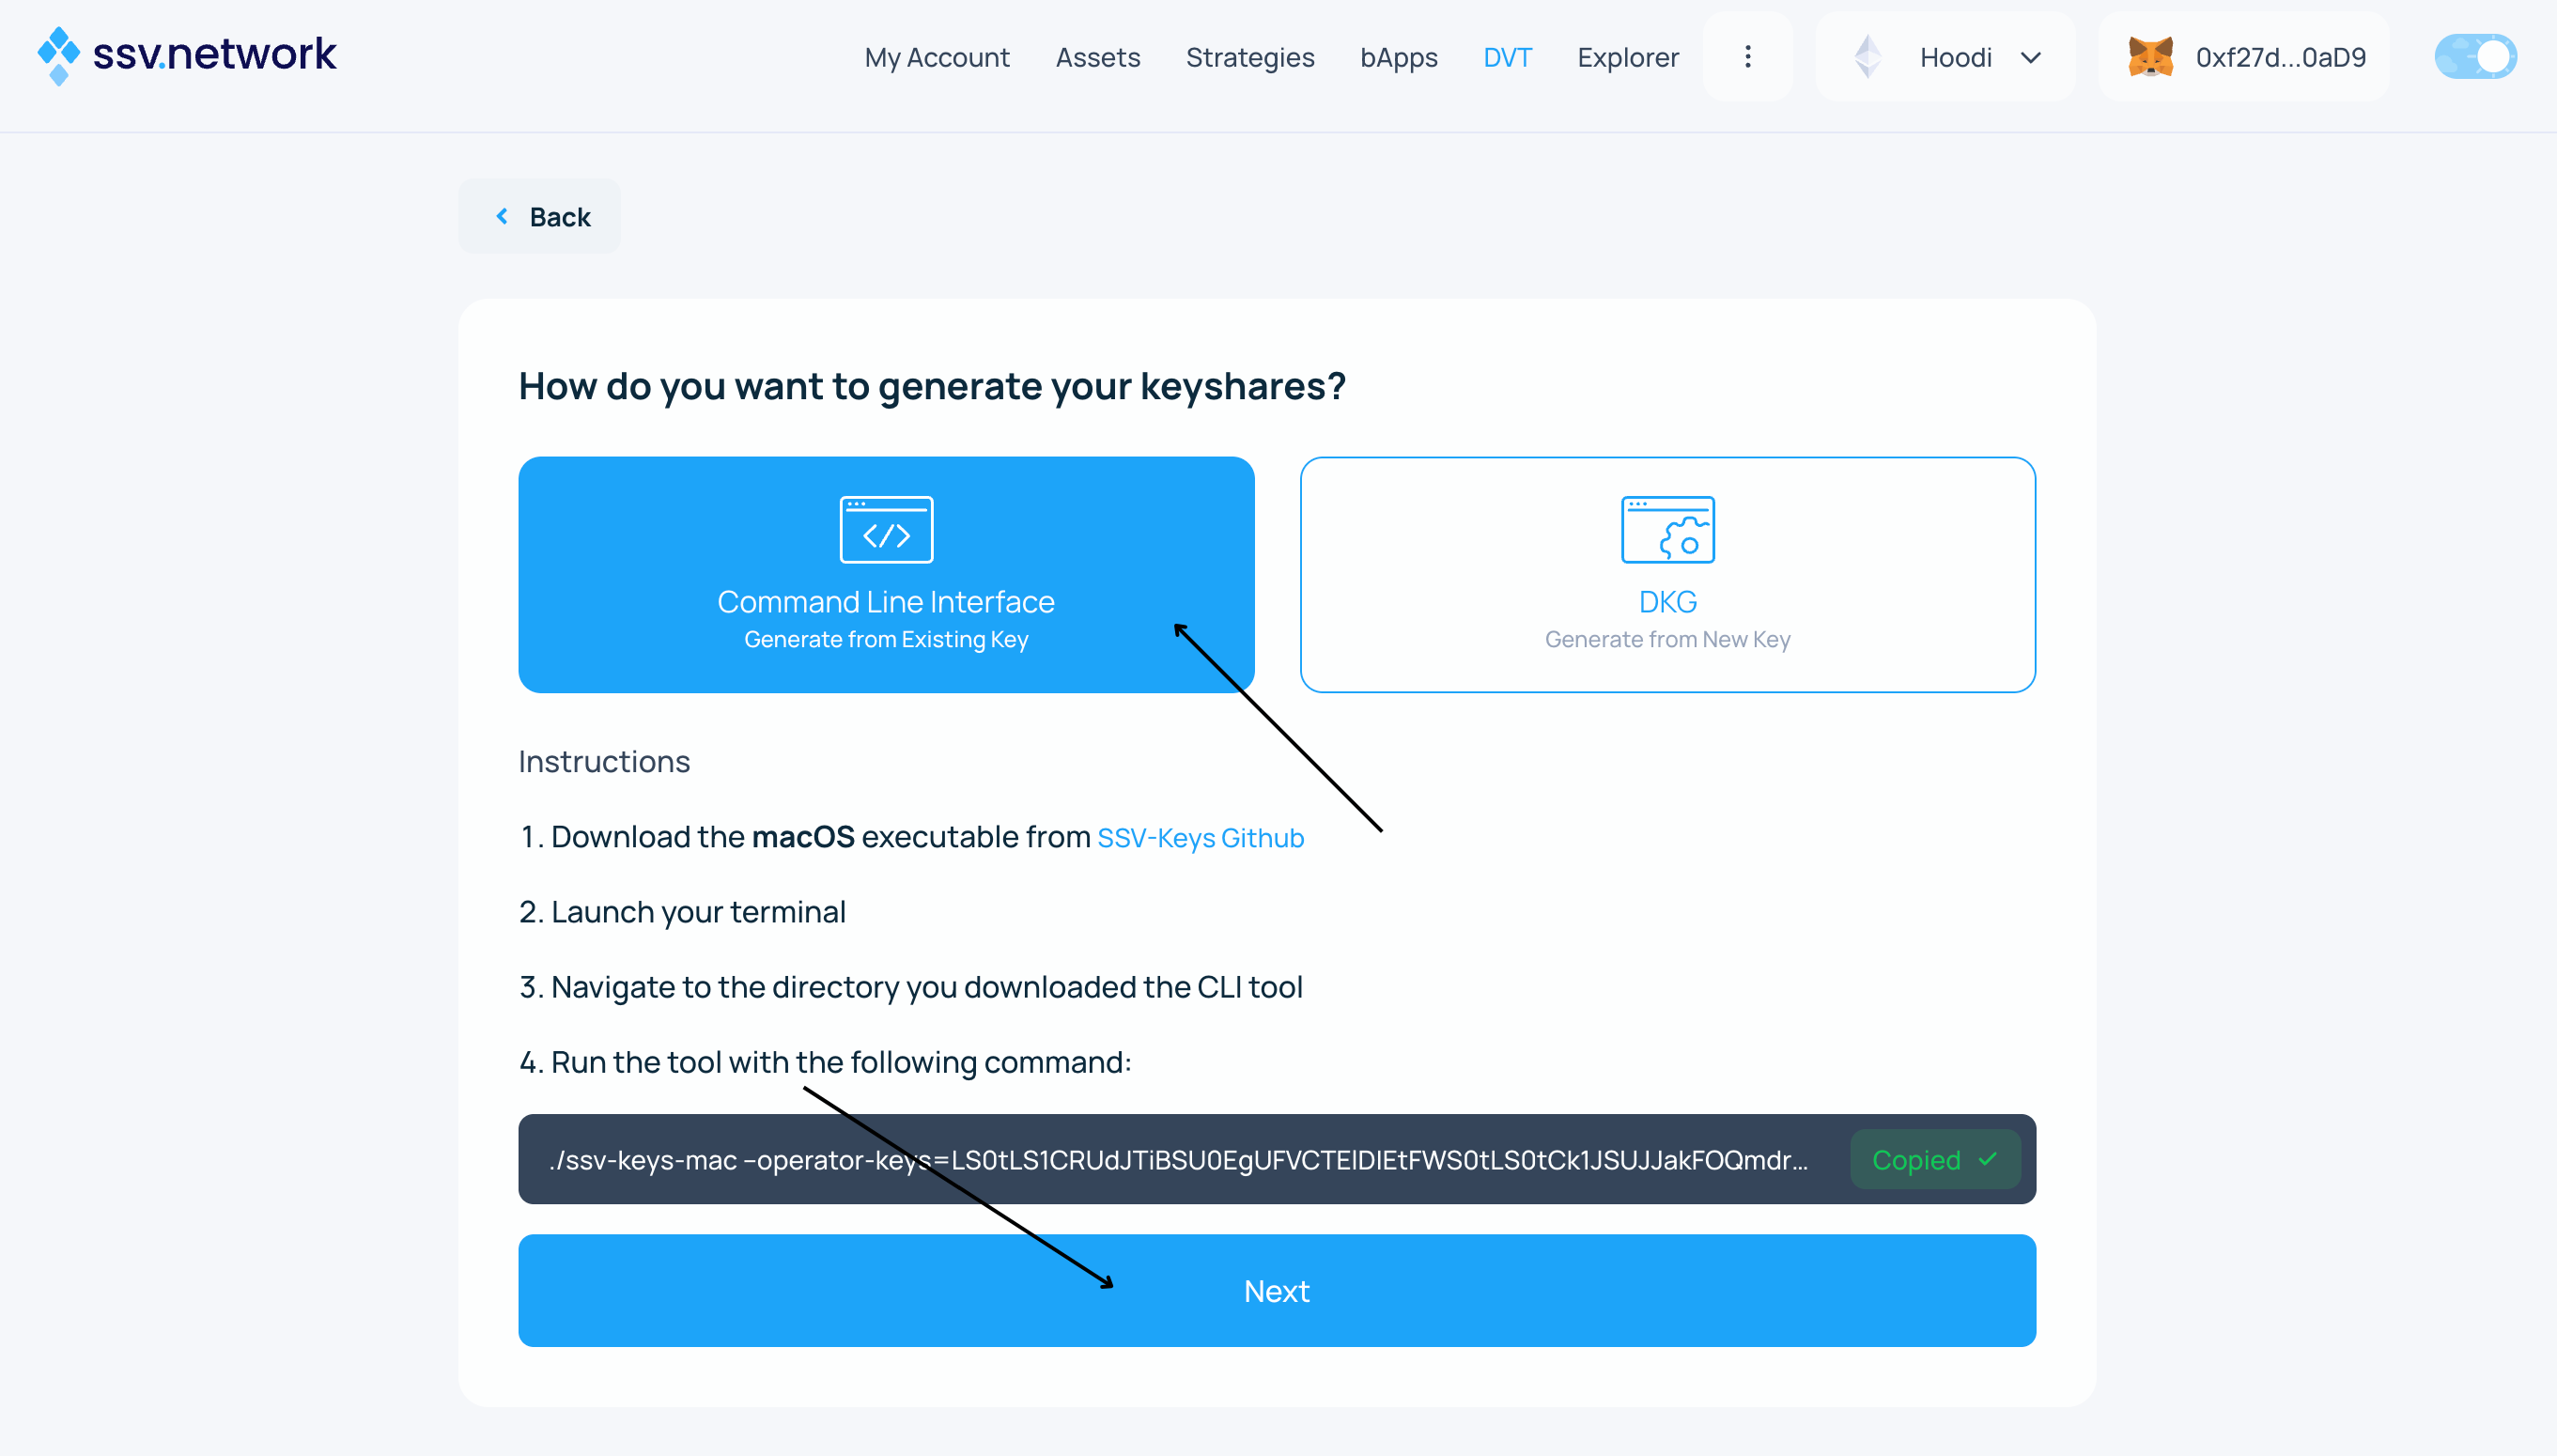
- Run the copied command in your terminal
./ssv-keys-mac --operator-keys=LS0tLS1CRUdJTiB... --operator-ids=5,6,7,8 --owner-address=0xf27...10aD9 --owner-nonce=0
When prompted, provide:
✔ Enter the path to your keystore file or directory containing multiple keystore files … /Users/user/.stakewise/0x43aee97f4122b4982915bcfd3d6acd0758fd1b52/keystores/keystore-m_12381_3600_0_0_0-1763993024.json
✔ Provide the keystore file password … ******************** <- type keystores password here
✔ Please provide a target path to generate the output to … /Users/user/ssv-keys/
1/1 ✅ keystore-m_12381_3600_0_0_0-1763993024.json
1 of 1 keystore files successfully validated. 0 failed validation
Generating Keyshares file, this might take a few minutes do not close terminal.
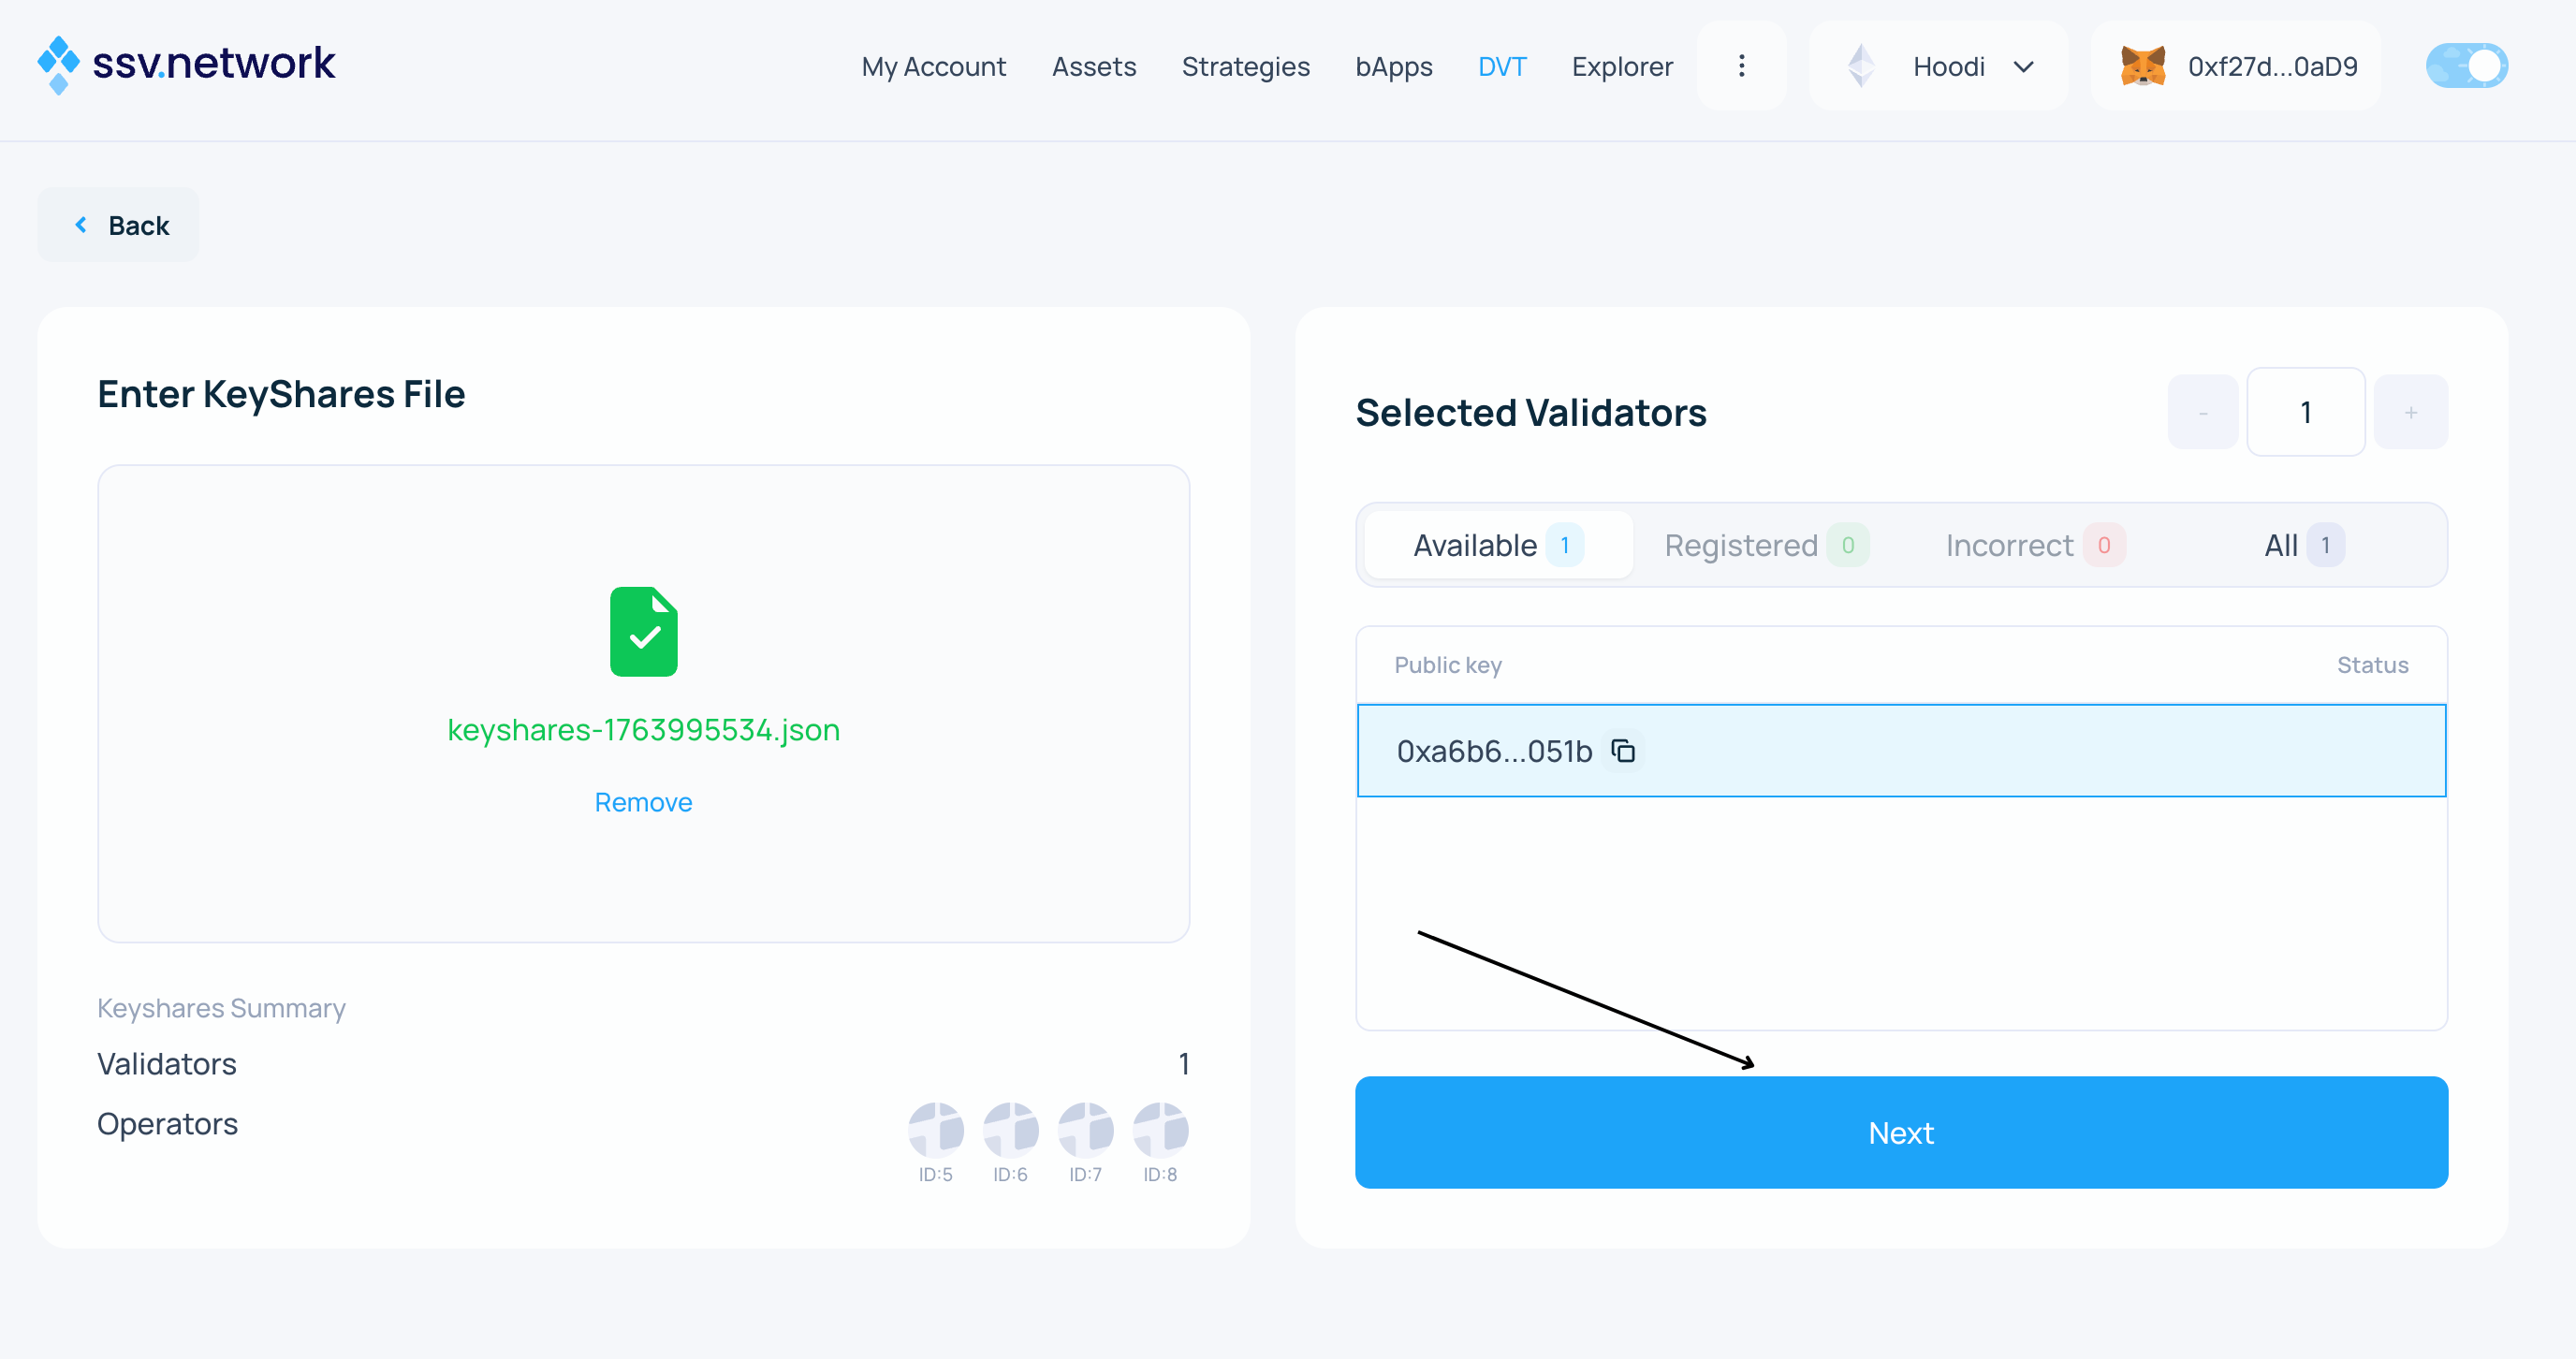
Key distribution successful! Find your key shares file at:
/Users/user/ssv-keys/keyshares-1763995534.json
This splits your validator key into encrypted shares using Shamir Secret Sharing (SSS), with each share encrypted for a specific operator.
Complete Registration
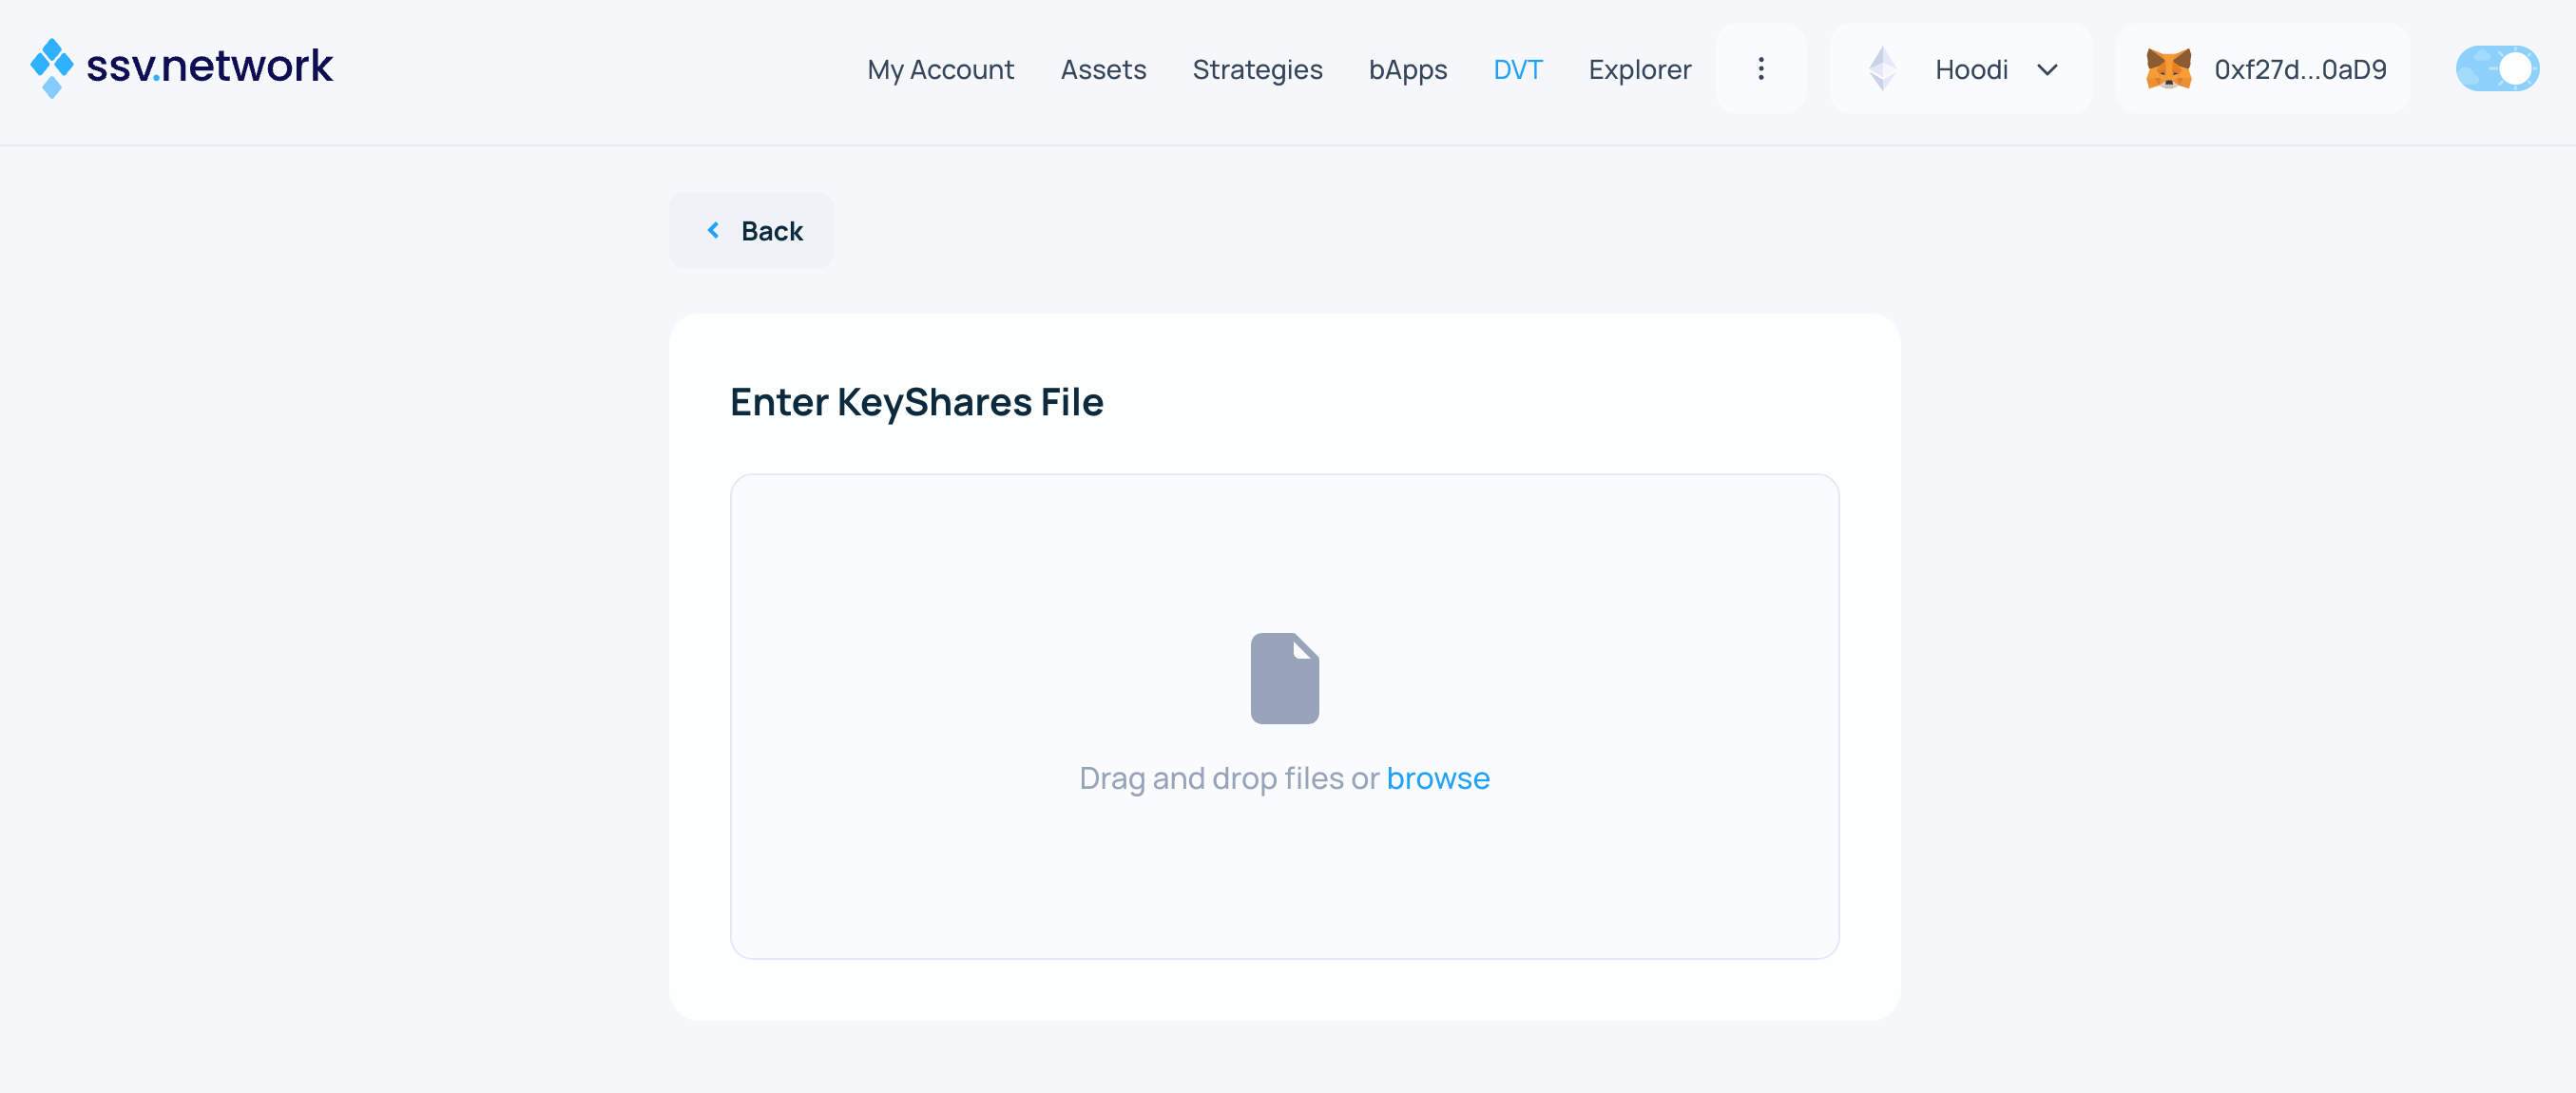
- Upload the generated KeyShares File
- Click Next
- Choose your funding period. The required SSV amount depends on your selected operators' fees and duration.
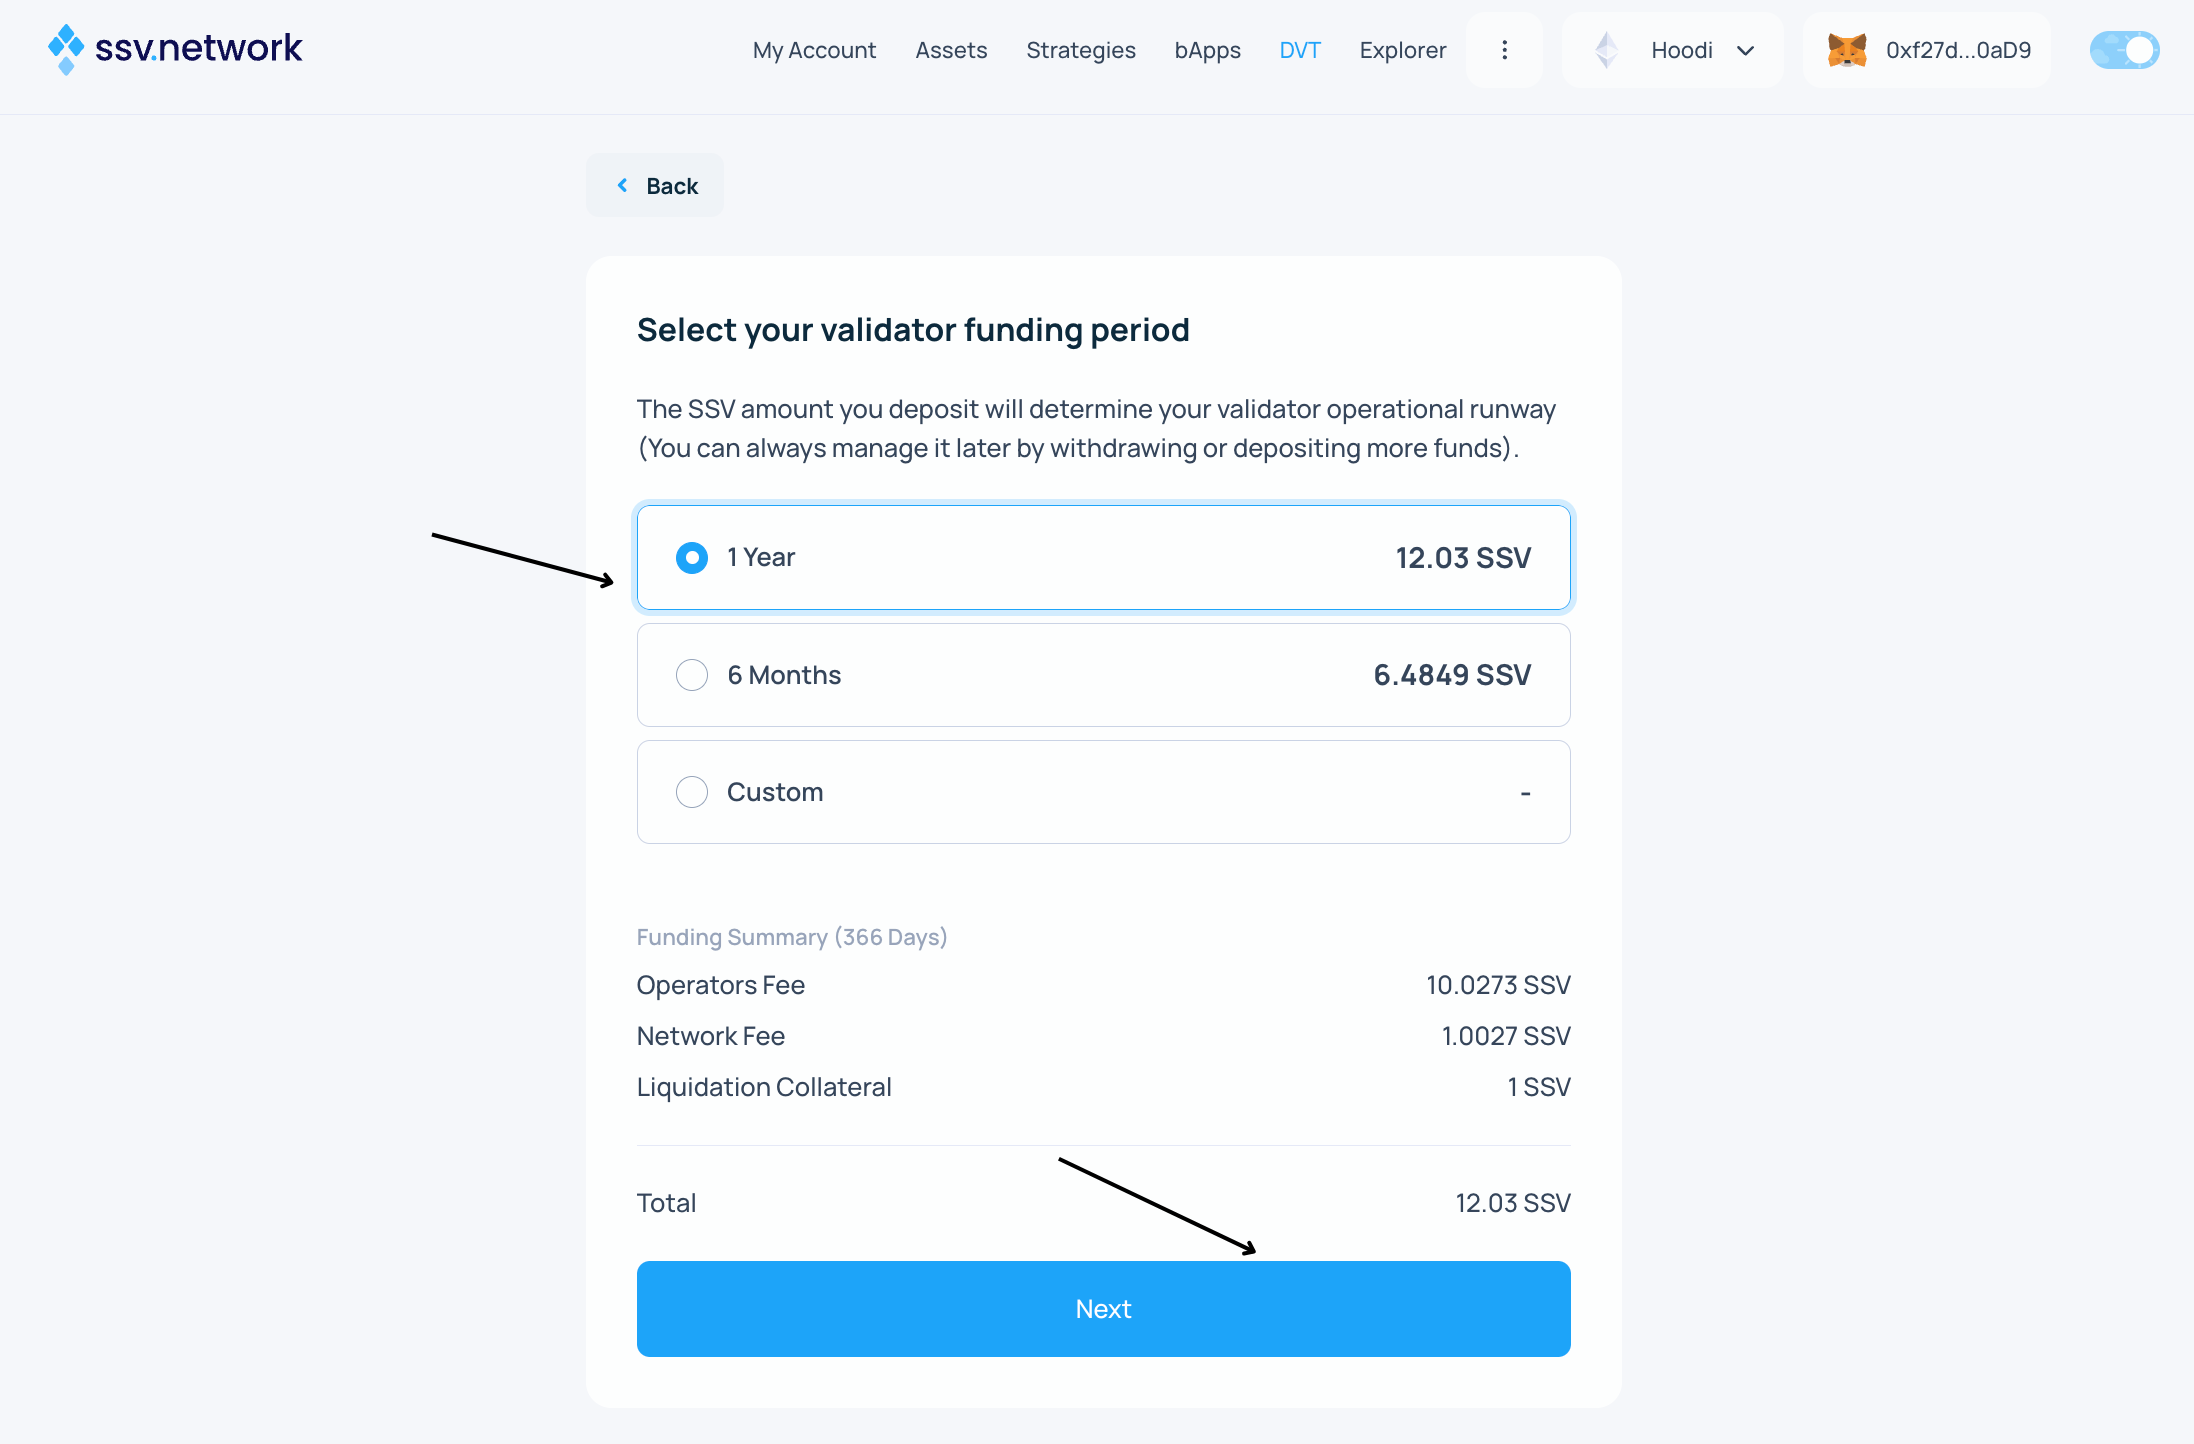
- Review cluster fees and acknowledge the risks, then click Next.
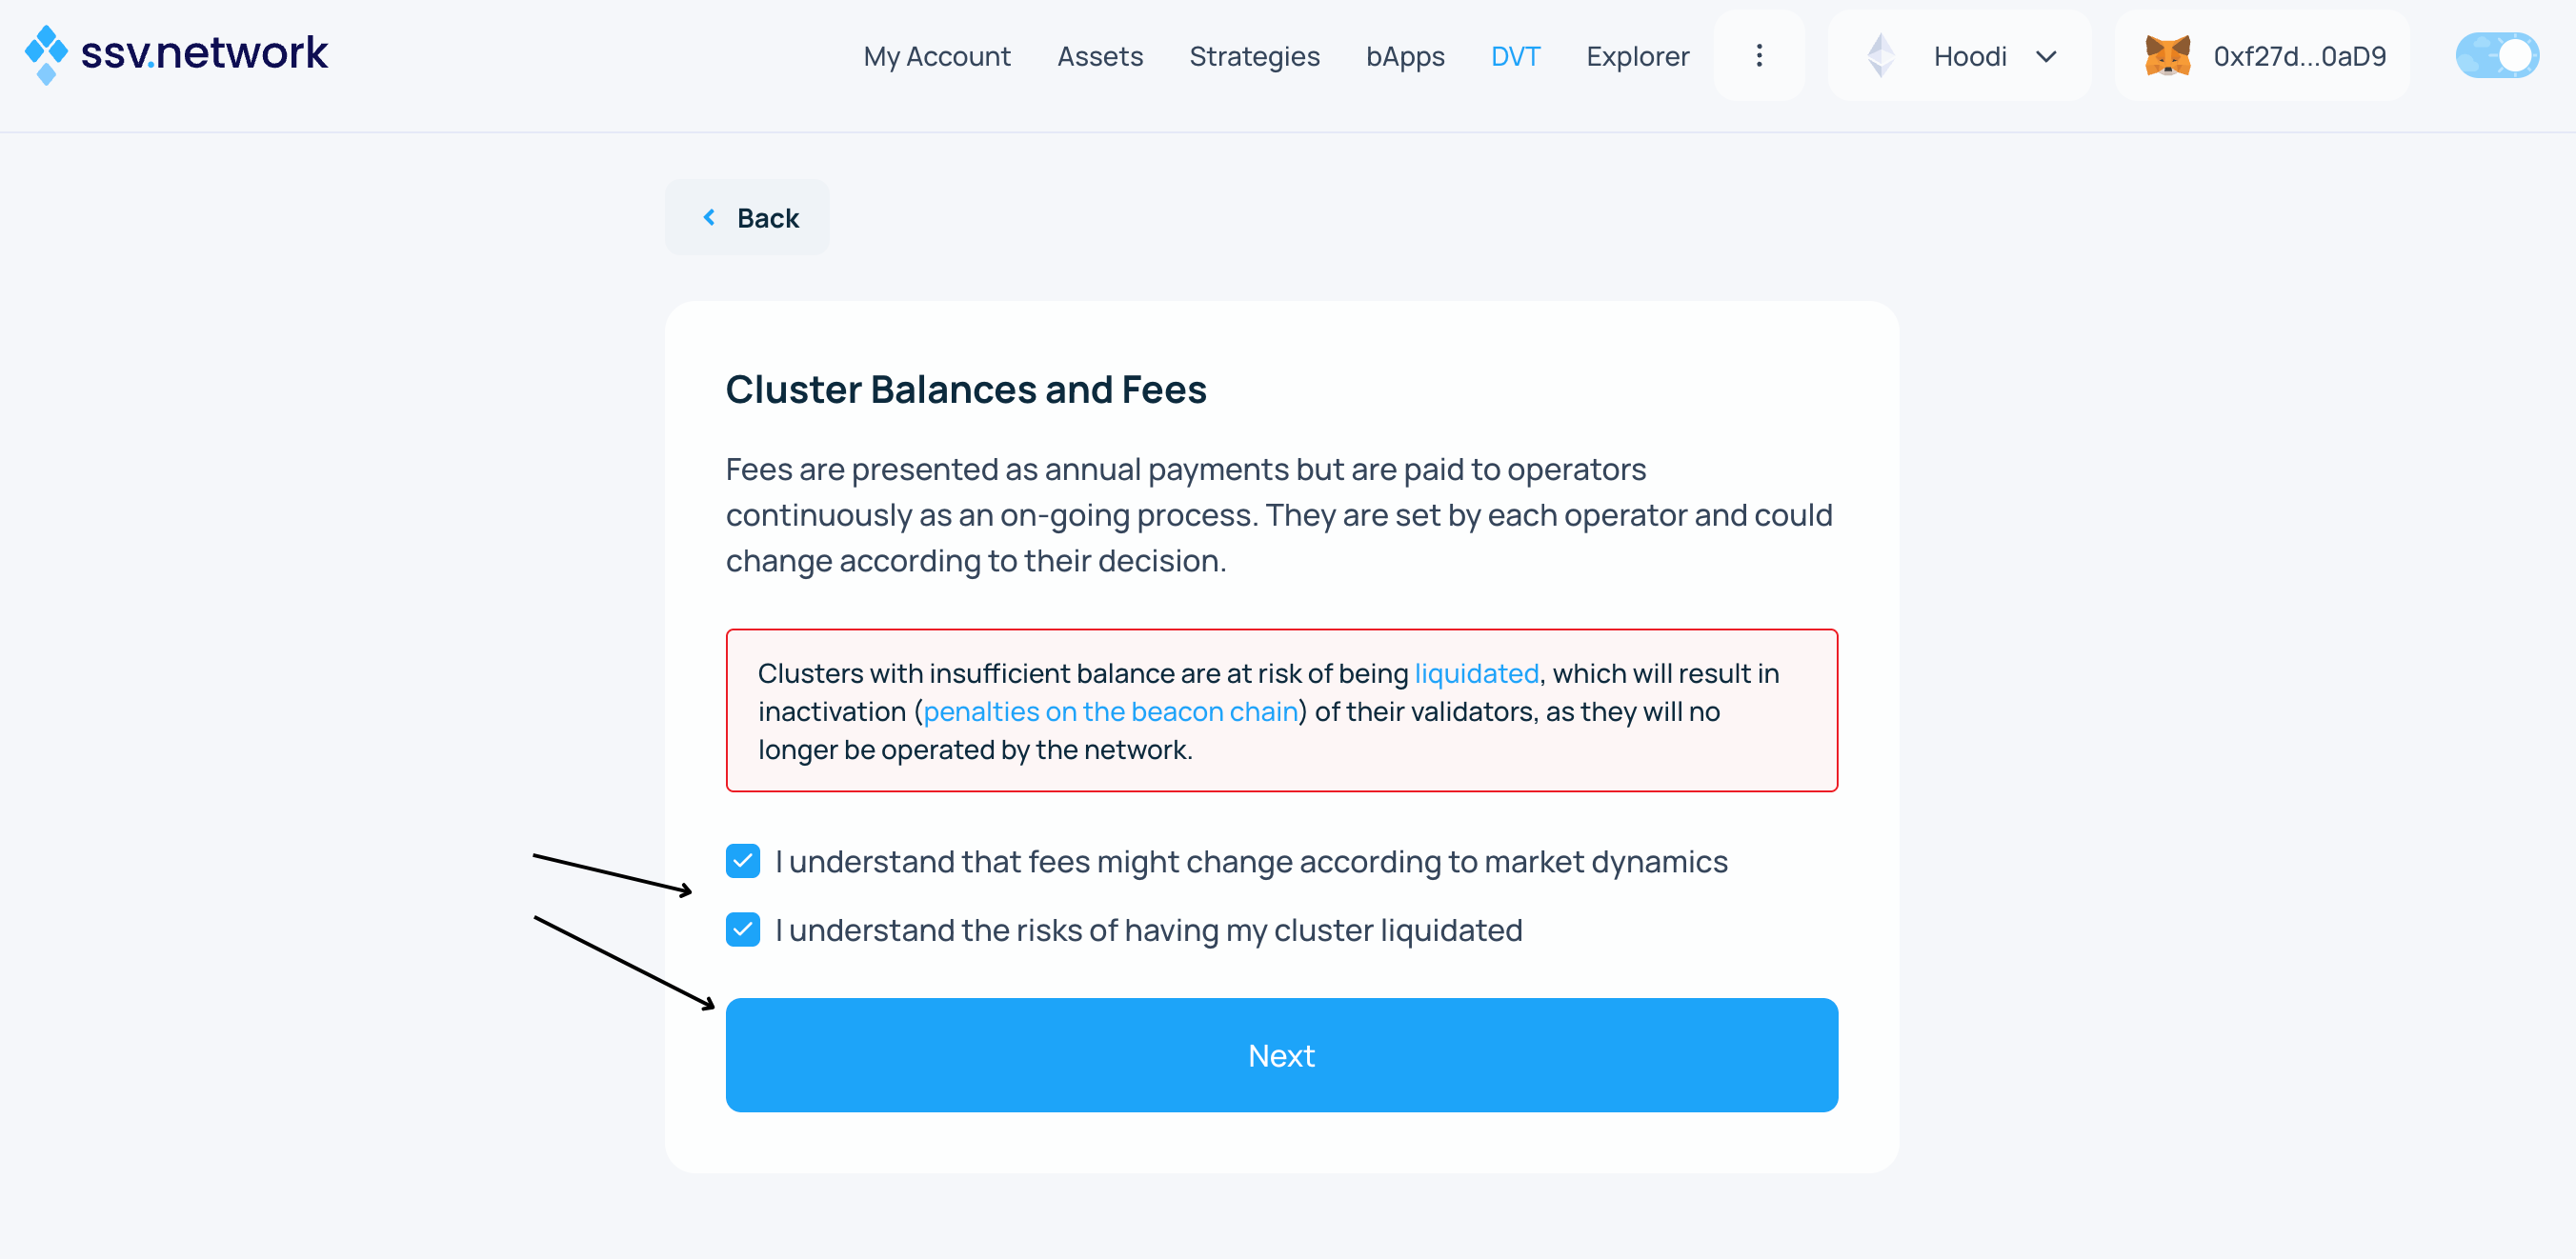
Liquidation Risk
Understand how fees are managed ↗ and keep your cluster balance above the Liquidation Collateral threshold. If liquidated, your validators will stop being operated, which could lead to penalties on the Beacon Chain. Learn more ↗
Critical - Stop Other Validator Clients
Ensure you have shut down any existing validator clients running this key before proceeding. Running the same validator key on multiple systems simultaneously will result in slashing.
- Acknowledge the risk and click Next

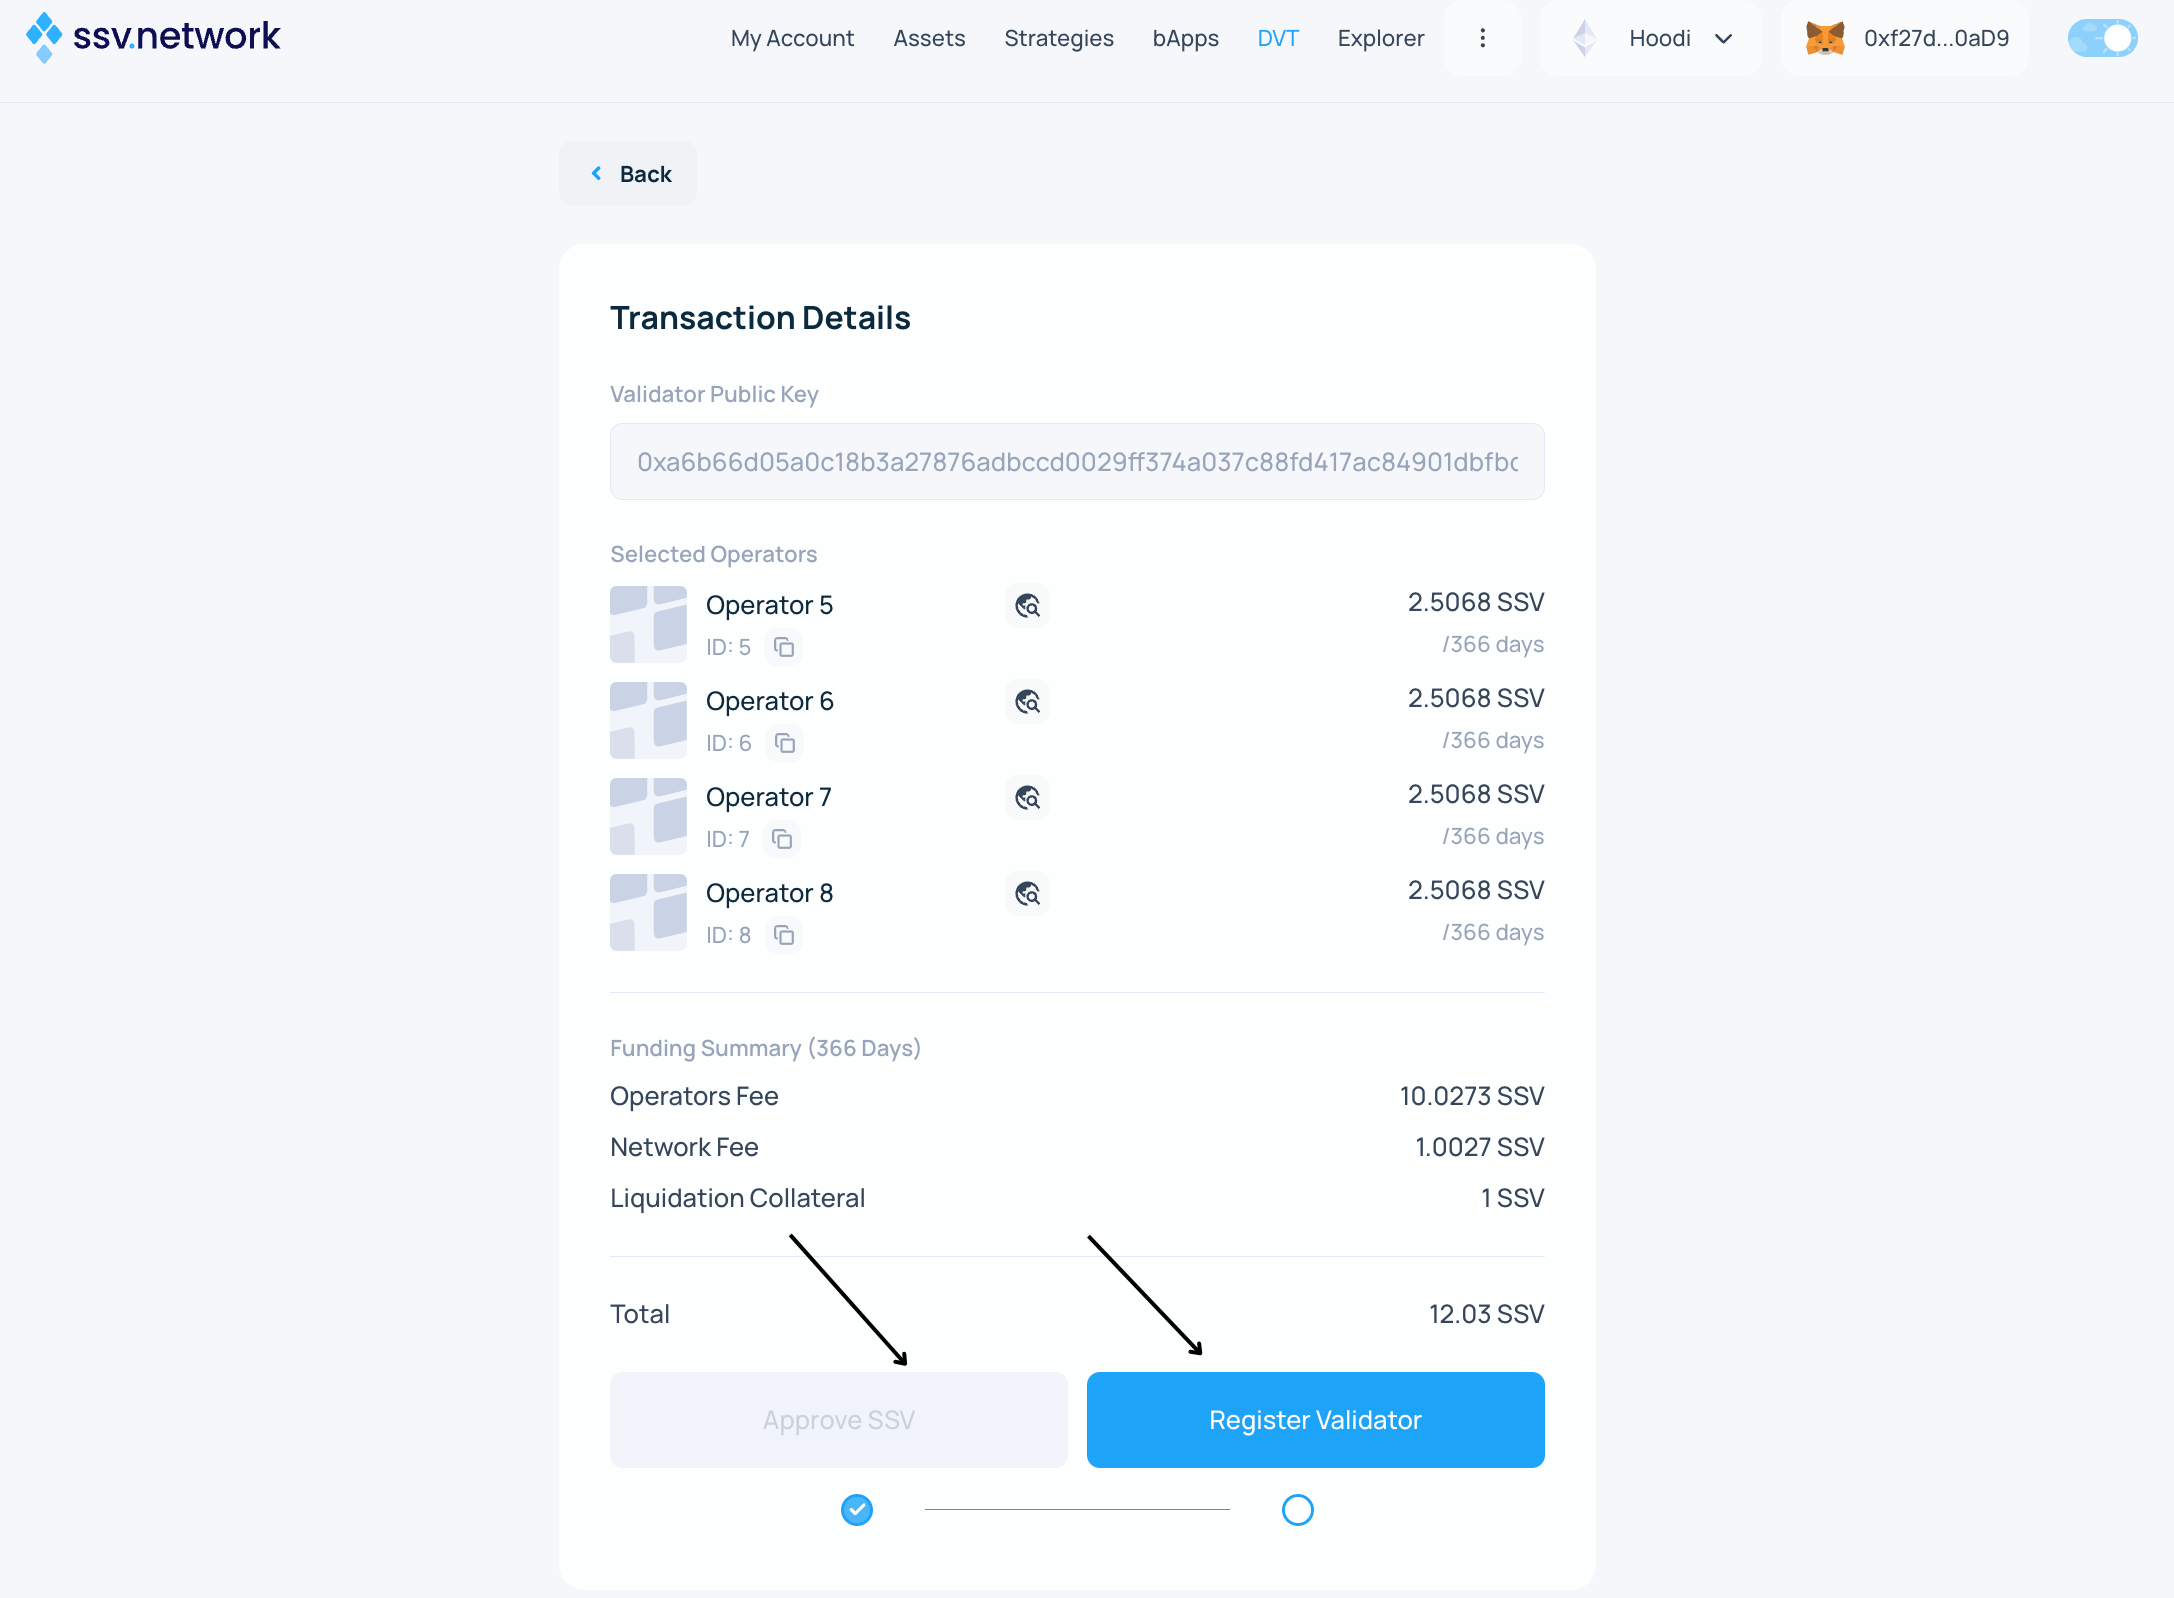
- The next screen presents a summary of your validator setup.
Review transaction details and complete two transactions:
- Click Approve SSV and confirm in your wallet
- Click Register Validator and confirm in your wallet
- Congratulations! 🎉 Your validator is now registered on the SSV network and being managed by your selected operators.